Introduction to PgAdmin and Databases
PgAdmin is one of the most popular, open-source tool for PostgreSQL/PostGIS. It is used as an administrative and development interface to interact with the Postgres Databases. For more information, you can visit pgAdmin’s official website. PgAdmin is available as a stand-alone software tool or as a part of the package with PostgreSQL. Since it is open-source, you can download and use it on your own systems or use the version installed on the PCs in the Lab.
The pgAdmin Interface
PgAdmin is a light-weight tool. The landing page when you open the tool is the ‘Dashboard’ as seen in the following image. In the Dashboard, you have the links to the documentation on the various aspects of pgAdmin and the world PostgreSQL. The documentation details everything about PostgreSQL based on the version installed in your systems.

Getting Started - Connecting to a server
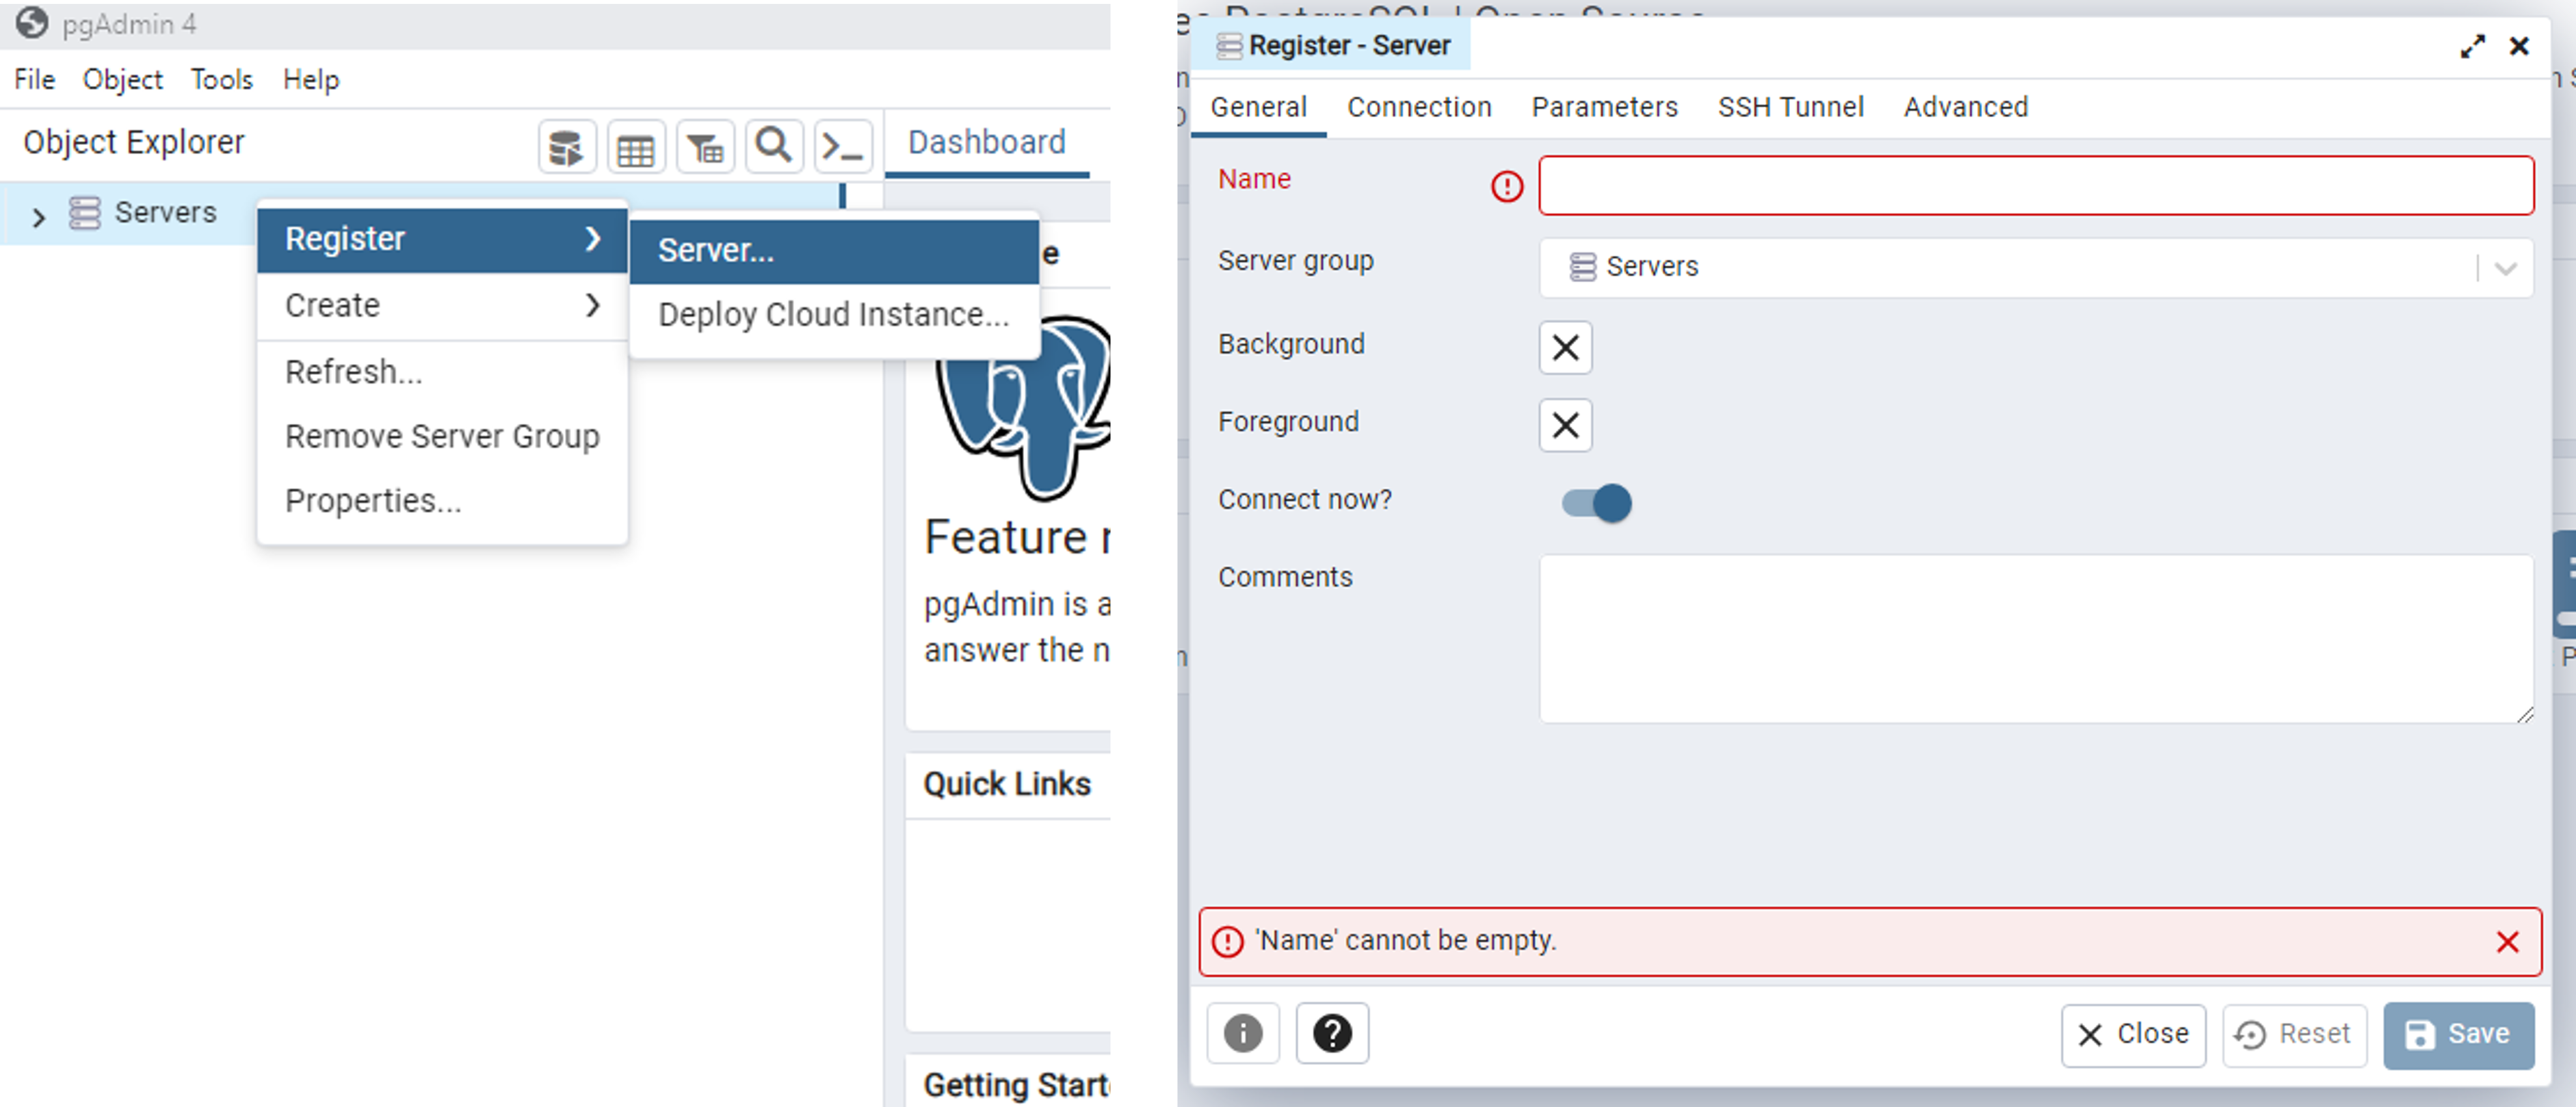
In the above image, you will see the ‘Object Explorer’. In this, you will see the list of servers connected. To connect a new server, right-click on the ‘Servers’ > Register > Server as shown in the following image.
When registering a server, especially a remote server, the following parameters need to be set.
Name: This is to identify your server. Ýou can it any name of choice.
Host name/address: This is the location where the server instance is running. To test out connection and settings. You can test out by connecting to the default ‘localhost’.
Maintenance database: This is the name of the Database running on the server you specified in the above Host name. For testing purposes, you could leave it with the default - postgres.
Username & Password: These are self-explanatory. If it is a local repository, you can use the default or set the values as per your choice.

Note
For the potential Exercise concerning the 3DCityDB, we will be using a remote server which alread has an instance of 3DCityDB v5 running on it. The above details then become crucial for establishing a connection to the server. All of the abovementioned details will be provided to you when the exercise tasks are posted. For more information on the 3DCityDB, please see the link here
Please create a generic database and see if the connection works and the postGIS extension is installed.
Warning
Please make sure to check the hostname, port number and other details properly. Even a small error will lead to a failed connection.
Understanding the Database Structure
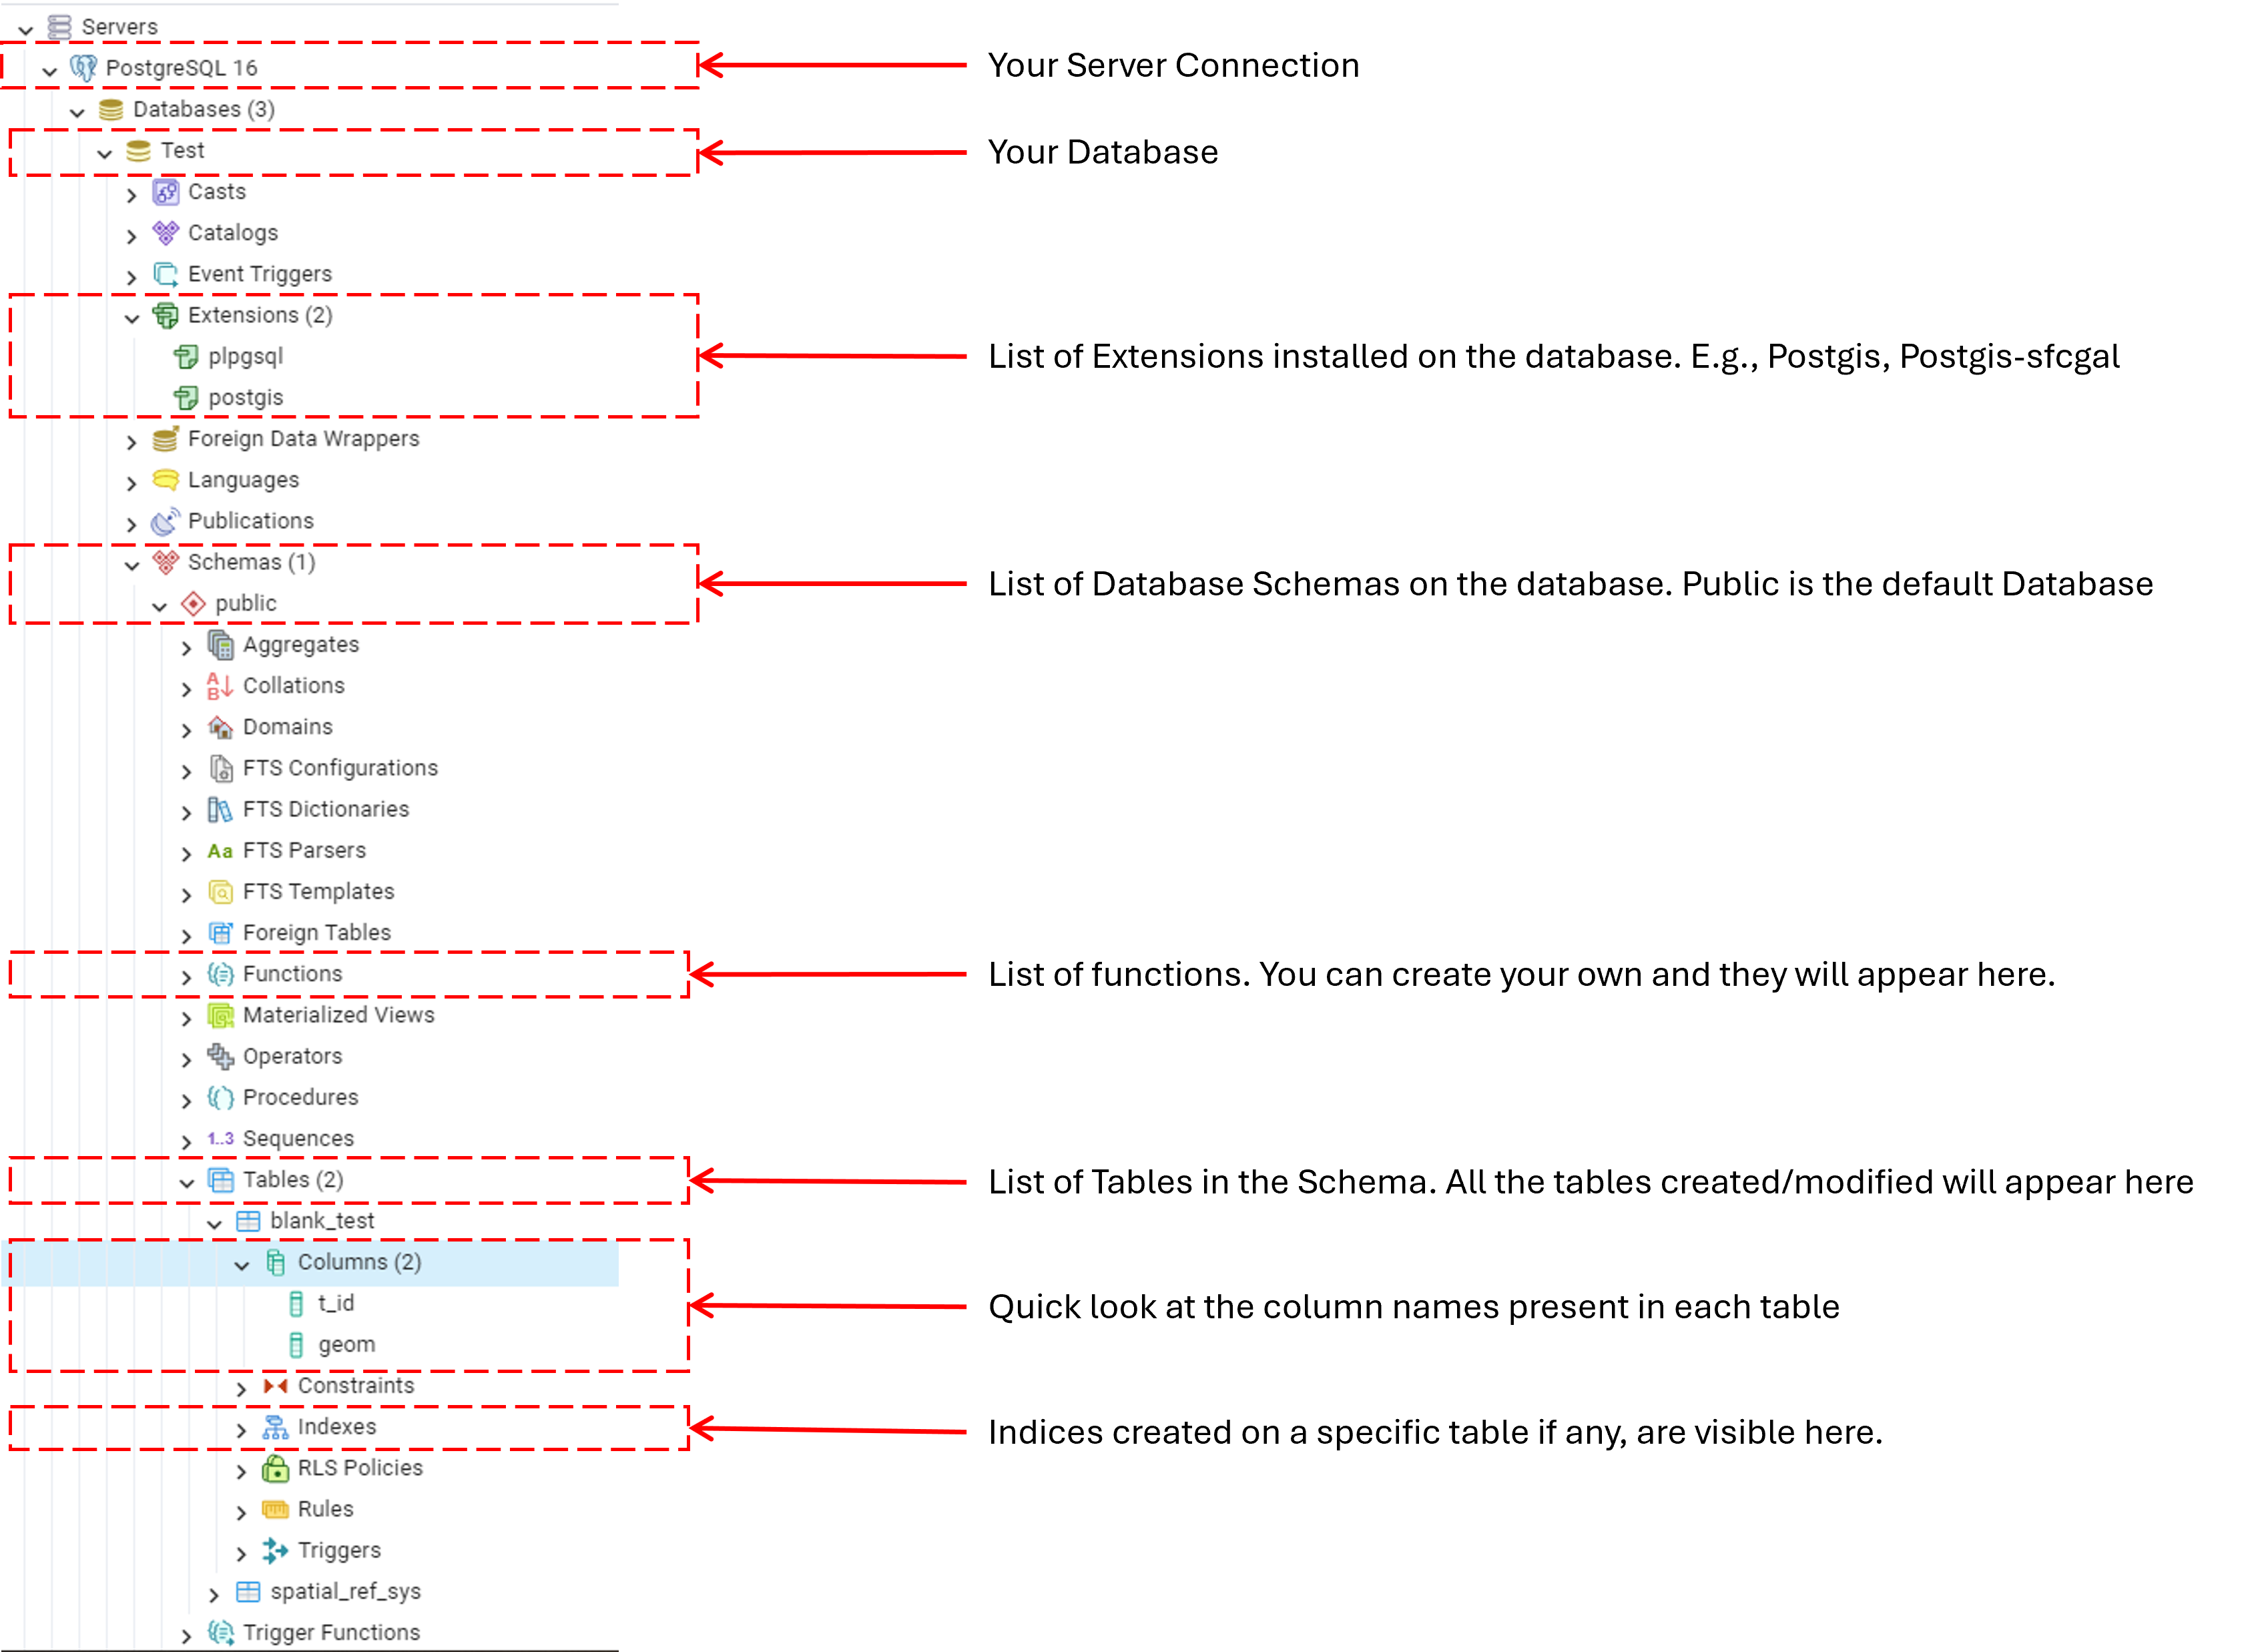
The Database is an organised hierarchically structured system for data storage and maintanace. The structure is generally like this - Server > Database > Schemas > Tables
Important things to know within the Database
Extensions: These are packages that can extend the capabilities of POstgreSQL for application specific functions. Some common extensions can be found in this link here. There are more and you can find specific extension by googling them. Extensions for PostgreSQL are similar to packages in the Python. PostgreSQL is the fundamental core and the Extensions strengthen and extend capabilities in a certain direction. For example, PostGIS is a powerful and popular extension to PostgreSQL that provides geographical and geometrical capabilities to database systems. In a new database, extensions are often not installed and need to be manually installed.
Note
We will be using PostGIS heavily in our exercises. And when using 3DCityDB, PostGIS is automatically installed on the instance but this would not be the case for other schemas. Please check if this is installed as the “Geometry” functions will not work without PostGIS
Schema: This is the structure of the RDBMS explained in a formal language. It is like the Masterplan or Blueprint. The default Schema for any database is the public schema. If you have bespoke schemas, they will be listed under the ‘schemas’ under your connected database.
Note
When you connect to the 3DCityDB instance, you will find the ‘citydb’ schema automatically listed. This contains all the tables which are mapped from the CityGML files.
Functions - This will list all the fuctions that are possible in the database. These will automatically include the functions from the installed extensions. You can also create your own functions which will then appear here.
Tables - This is the most important thing to know since the tables contain all the information that you will need. Under the tables, you will find additional parameters such as Columns, Constraints, Indexes, etc. These will give you a quick look at the structure of the table.
For the Tutorials
Restore the sql file provided.
Right-click on the database (default is PostgreSQL) and find the option “Restore”.
This will open a new window where you can upload the .sql file that you will find in Moodle
Writing SQL Queries
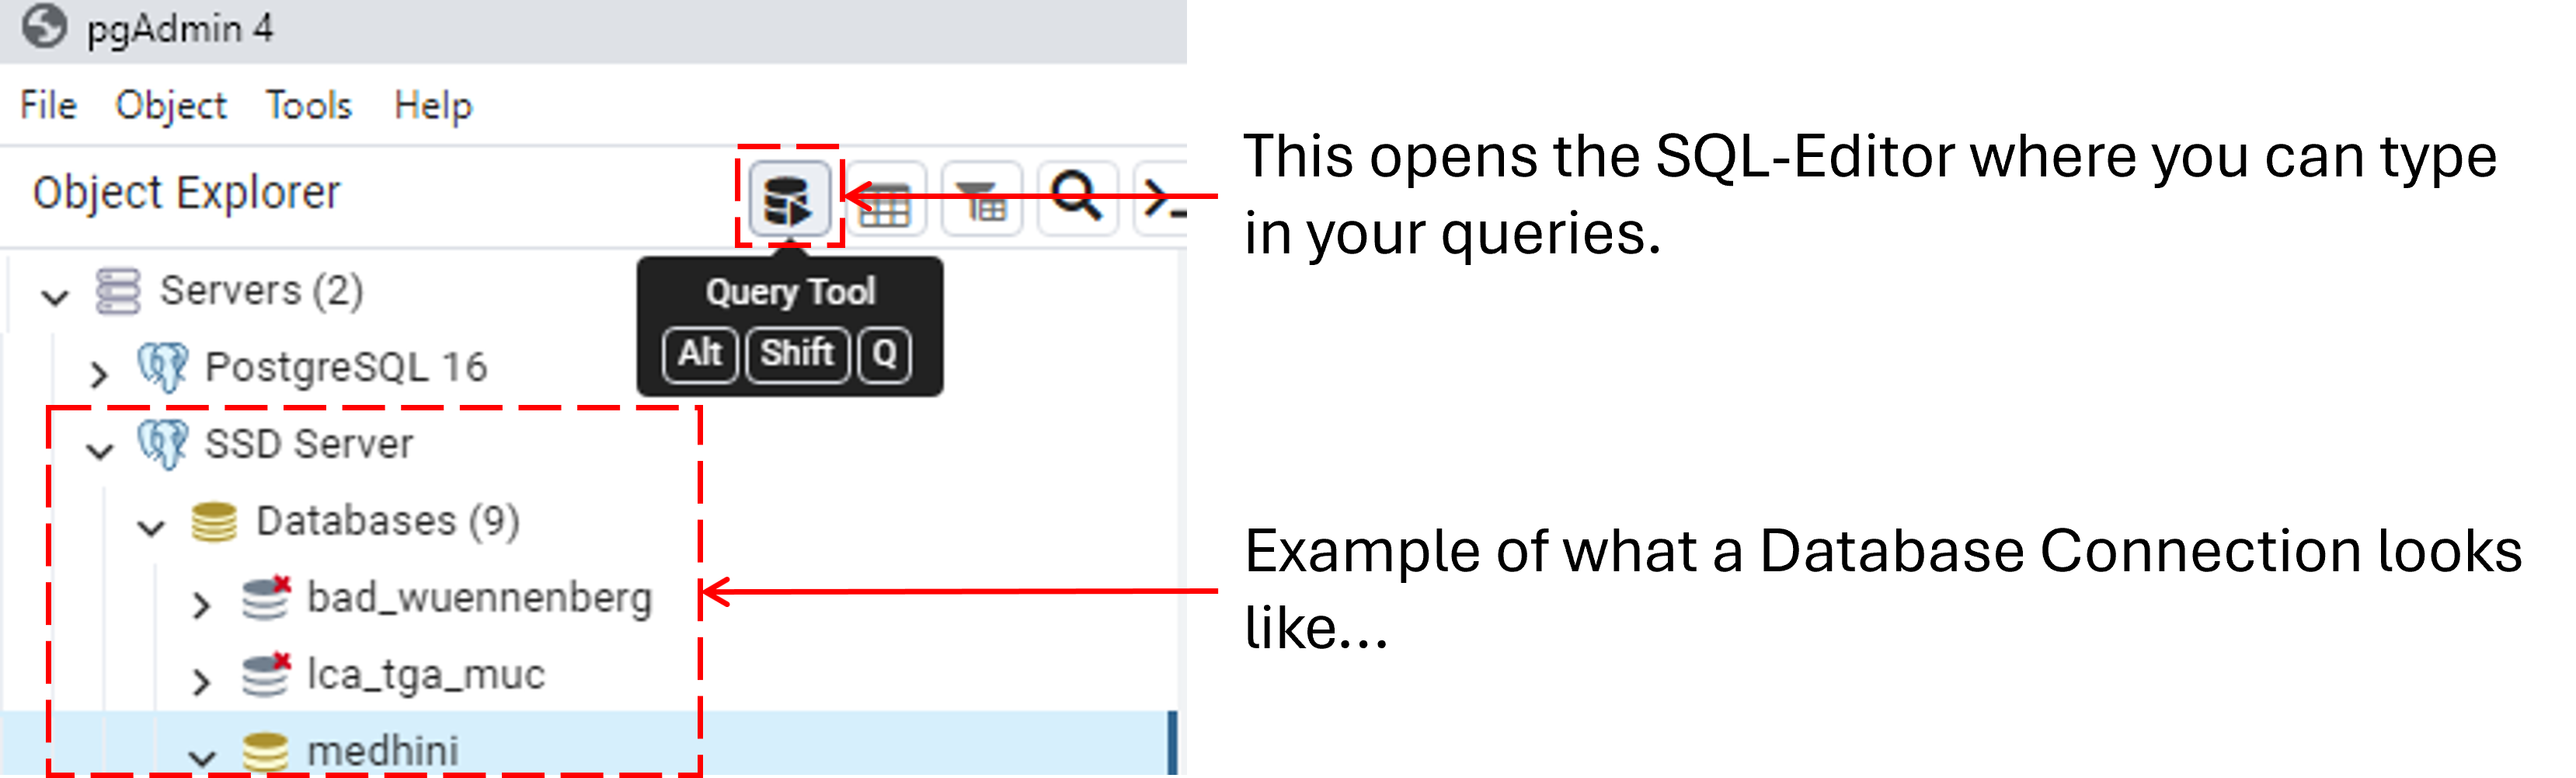
Open the ‘SQL Editor’ to type in your SQL codes.
Warning
Your database has to be selected before the Query tool becomes available. Please click on the database you created/connected to before you try to open the editor.
SQL Test Queries
Please check the table names again before typing in the query
Sample Query 1: Creating a new table ‘eu_countries’ and inserting values into it based on a condition that only countries with the eu_stat or efta_stat with a value T (true) are selected. We will also reduce the number of columns for convenience - Projection and Selection together
--Example for creating a table
CREATE TABLE eu_countries (
   id int,
   name varchar(254),
   capital varchar(254),
   country_isocode varchar(100),
   geom geometry
);

--Insert values into the table based on condition
INSERT INTO eu_countries
SELECT
  id,
  name_engl,
  capt,
  iso3_code,
  geom
FROM countries_3035
WHERE eu_stat = 'T' OR efta_stat = 'T';

--View the final table with results
SELECT *
FROM eu_countries;
Sample Query 2: Identifying what kind of geometry exists in the world_cities table.
--Using a basic geometry function to identify geometry type in the table.
SELECT ST_GeometryType (geom)
FROM cities_world_3035;
Sample Query 3: Count the number of rivers per country and display the count by country name (Hint: Use spatial functions to join the tables)
--Using aliases when querying from multiple tables and using spatial functions to check for conditions
SELECT co.name_engl, count(r.id)
FROM countries_3035 co, rivers_3035 r --here co and r are "aliases" for the columns countries_all and rivers respectively!
WHERE ST_Intersects(co.geom, r.geom)
GROUP BY co.name_engl