FME - Feature Manipulation Engine
FME by Safe is a versatile software that can work with hundreds of different data sources and enable workflows to generate meaningful output for a wide range of applications.
Licensing
The FME license file (fmelic) received via email from Safe software also contains step-by-step instructions on how to activate FME. The following is just a reiteration of those steps.
Installation & Activation Instructions
The following installation guidelines are for your personal systems in case you would like to work beyond the Exercise hours. The software is already installed on the CIP pool systems for your use.
Download the fmelic license file attached to this email.
Save the fmelic file to a location on your computer where you can easily find it later.
Open FME Desktop.
In the licensing wizard, select “Manual licensing”, and click on the “Select License File” button.
Browse to the location where you saved the downloaded file and select it.
Follow the prompts to complete the license installation.
If the above method does not work, try the following steps:
Download the fmelic license file attached to this email.
Save the fmelic file to a location on your computer where you can easily find it later.
Open File Explorer and navigate to the c:programdatasafe softwarefmelicenses folder.
Copy the fmelic file into this folder.
Run FME Desktop.
The FME Interface
The FME Desktop consists of 2 components – the Data Inspector and the Workbench. The Data Inspector as the name suggests is a visualisation tool to open files and inspect the data. The Workbench consists of transformers (tools) which can be used to edit any recognised data source. The workflow in the workbench is done by means of visual programming. This will be explained in the sub-section FME Workbench.
See also
You can use any CityGML data you like. You can download some test datasets from the ../00_Tutorials/DataLinks
Important
Please note that “FME Desktop” referred to here is version 2022 or older. It is referred to as “FME Form” from version 2023. Both have the same components.
FME Data Inspector
To open, first go to the Start Menu and search for the FME Data Inspector. Once the Data Inspector loads, this is the first screen you will see.
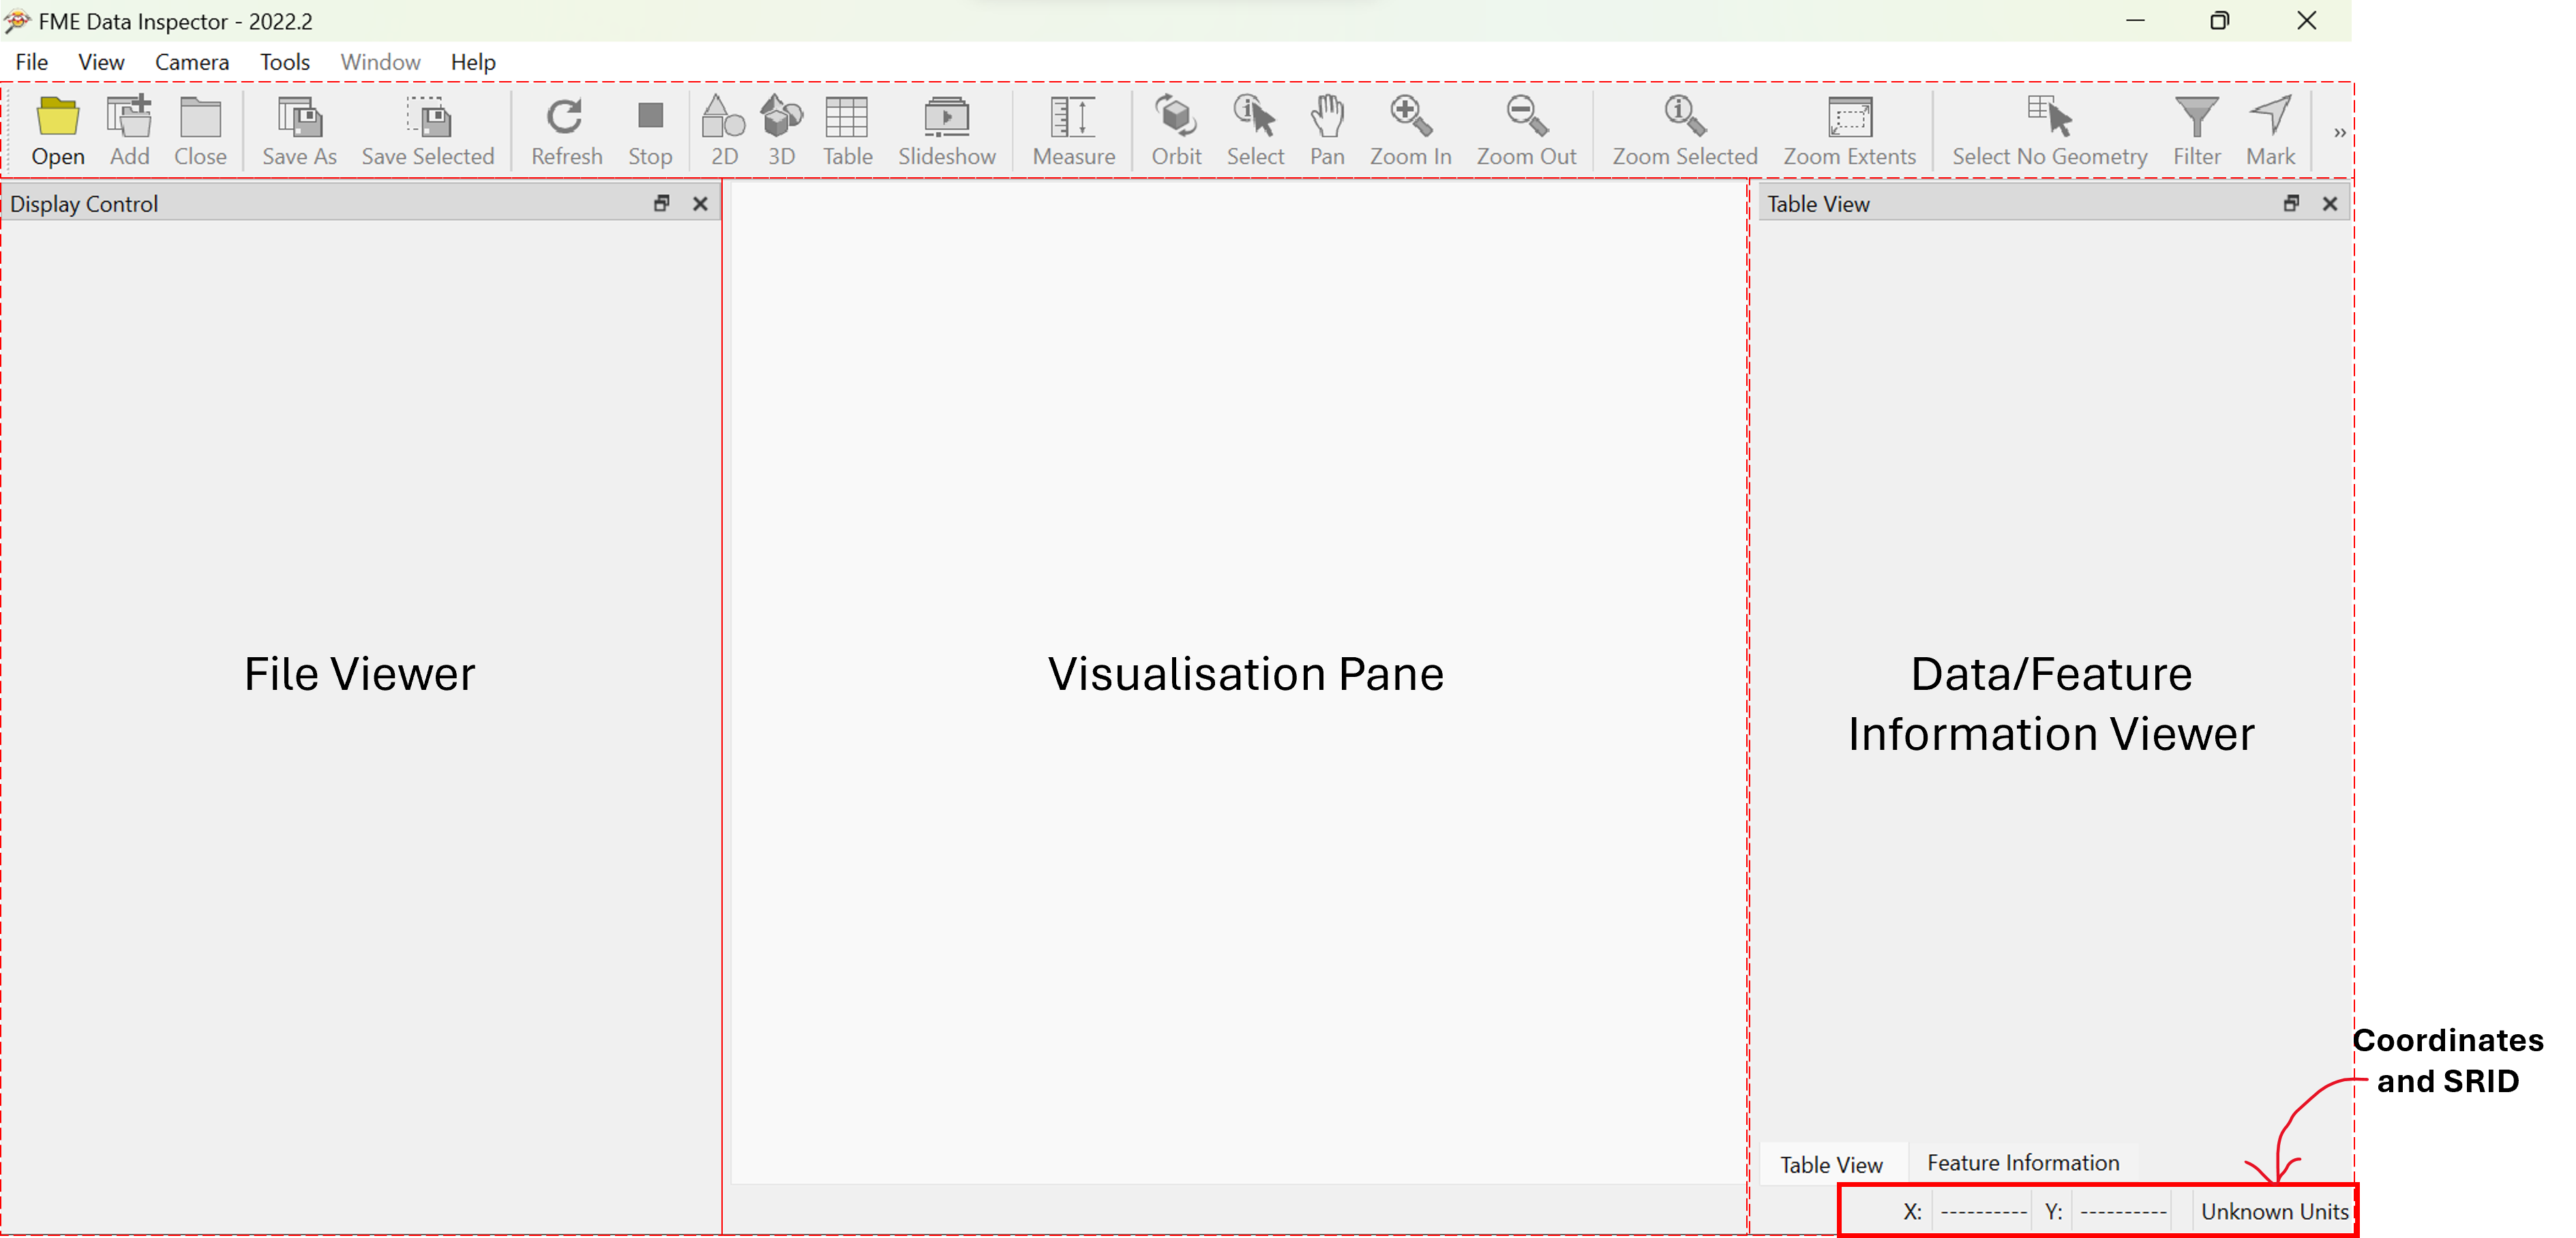
Use the Open button in the ribbon to add a file to add your first file to the Inspector. The following window will pop up.
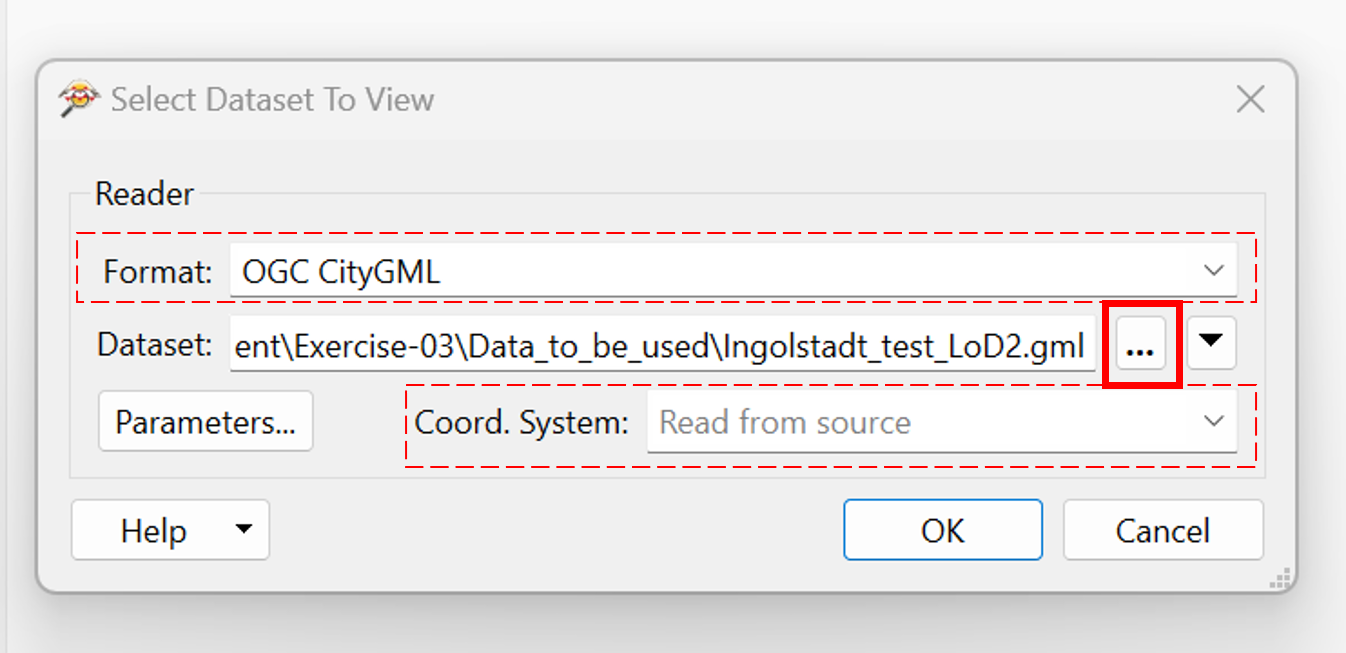
Select the dataset (Ingolstadt_test_LoD2 in this case), from the datasets provided in the exercise by using the button “…”
Note
The format can be read automatically from the source or can be defined by the user from the dropdown menu. The coordinate system will be automatically read from the source. Some files might require additional parameters such as when connecting to Databases. For CityGML, we currently need not set any additional parameters.
Click OK to open the file in the inspector view.
Note
The file always opens in the top view. The left panel (Display Control) shows the files along with the layer information. It also shows the total number of features in any given layer. Further it denotes whether the information has geometry or not.
- Represents tabular data without geometry
- Represents geometric features.
Tip
Once a file is added to the viewer, other buttons in the ribbon are activated. Further files can be added to the same view using the Add button. If the Open option is used, the files chosen would be opened in a separate viewer. Also, The files can be viewed in both 3D and 2D depending on the type of geometry. In the 2D view, a base map can be added to the view which is not possible in 3D.
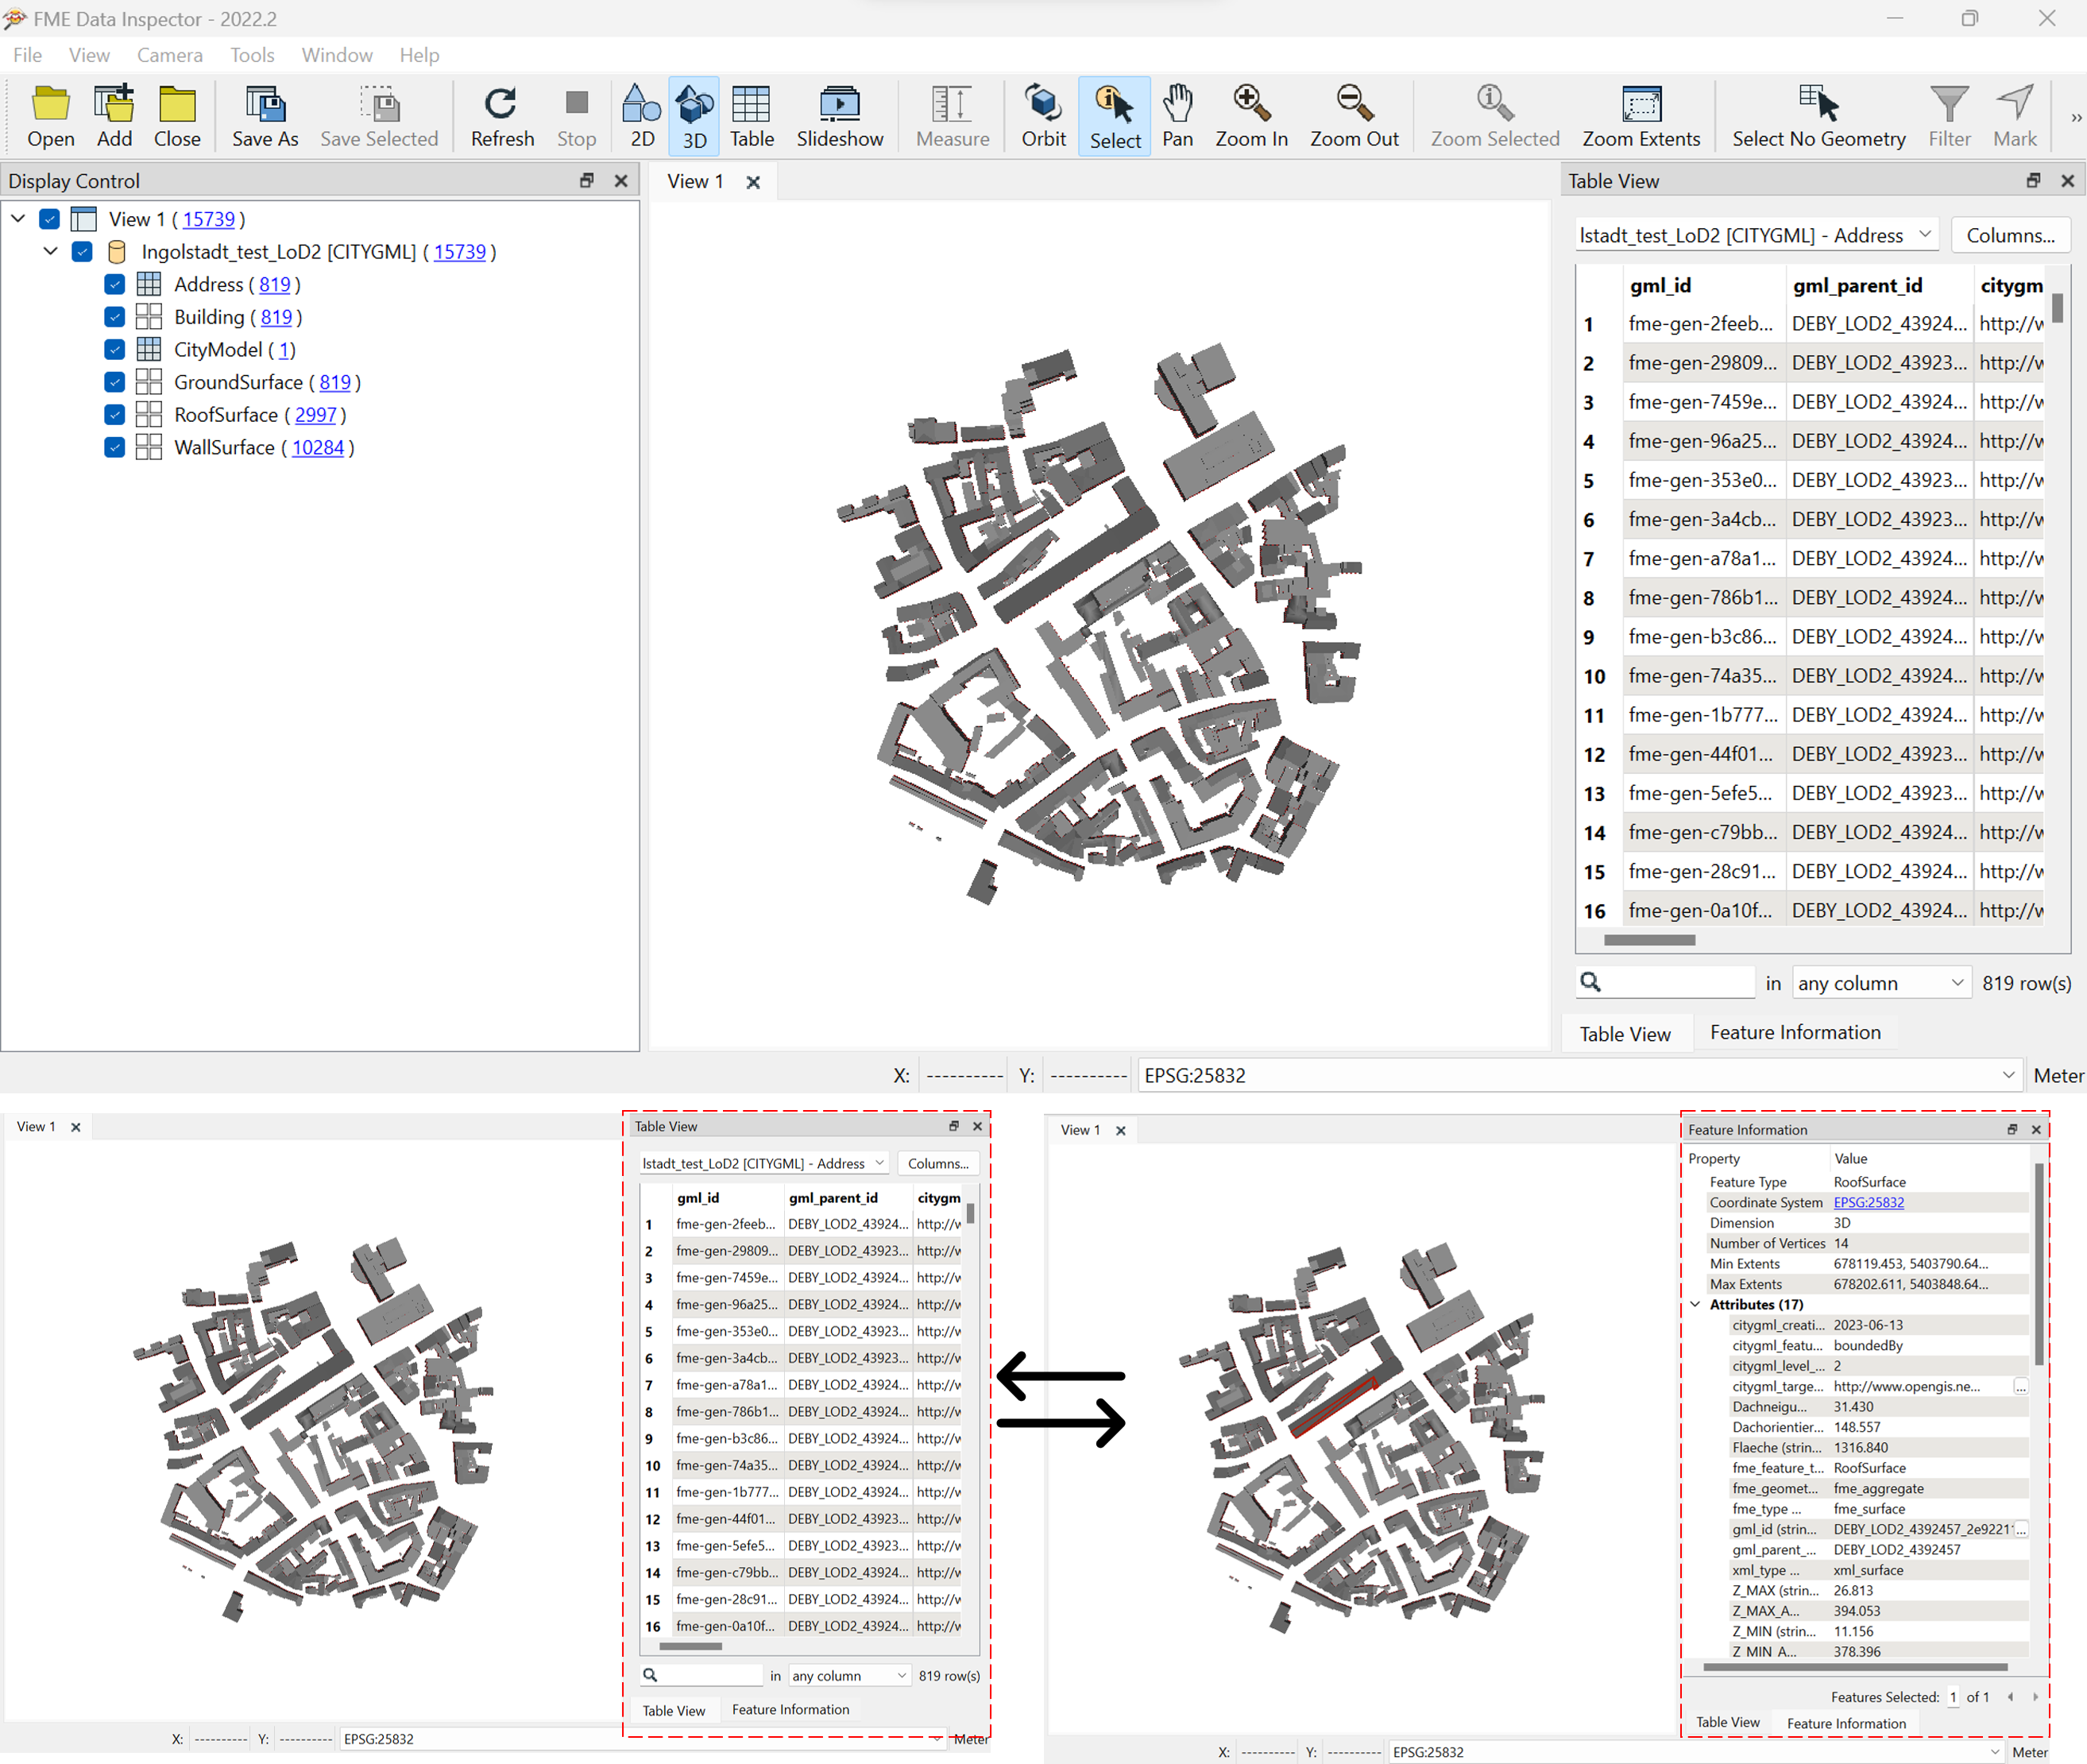
The tabular representation in the right panel shows all the features along with their attributes. When an individual feature is selected, the Table View automatically toggles to Feature Information to give detailed information about the feature attributes and geometry.
The panels can be moved around, and the sizes of the panels can be adjusted by the user. The tools in the ribbon can be used to move the model around and inspect it in various angles and zoom ratios.
Close the inspector once you have understood how it works. Next we explore the other tool – FME Workbench
FME Workbench
The FME workbench is a separate application and can be opened from the Start Menu. Once the Workbench opens, this is the first screen you will see.
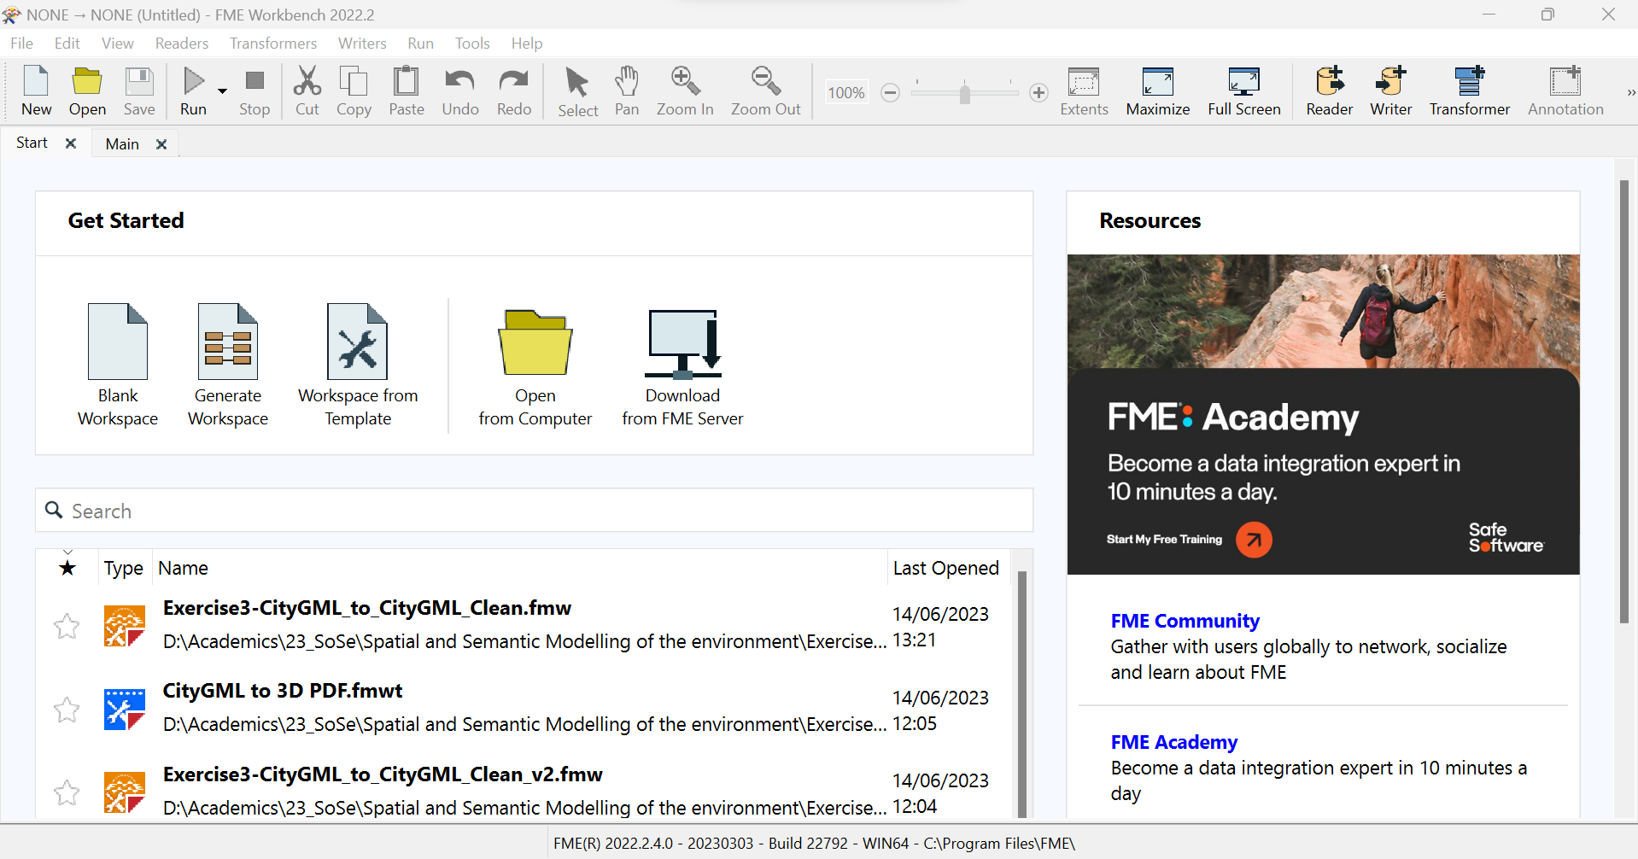
Start by clicking on Blank Workspace in the Get Started panel. This will open a clean window where you can begin your workflow processing.
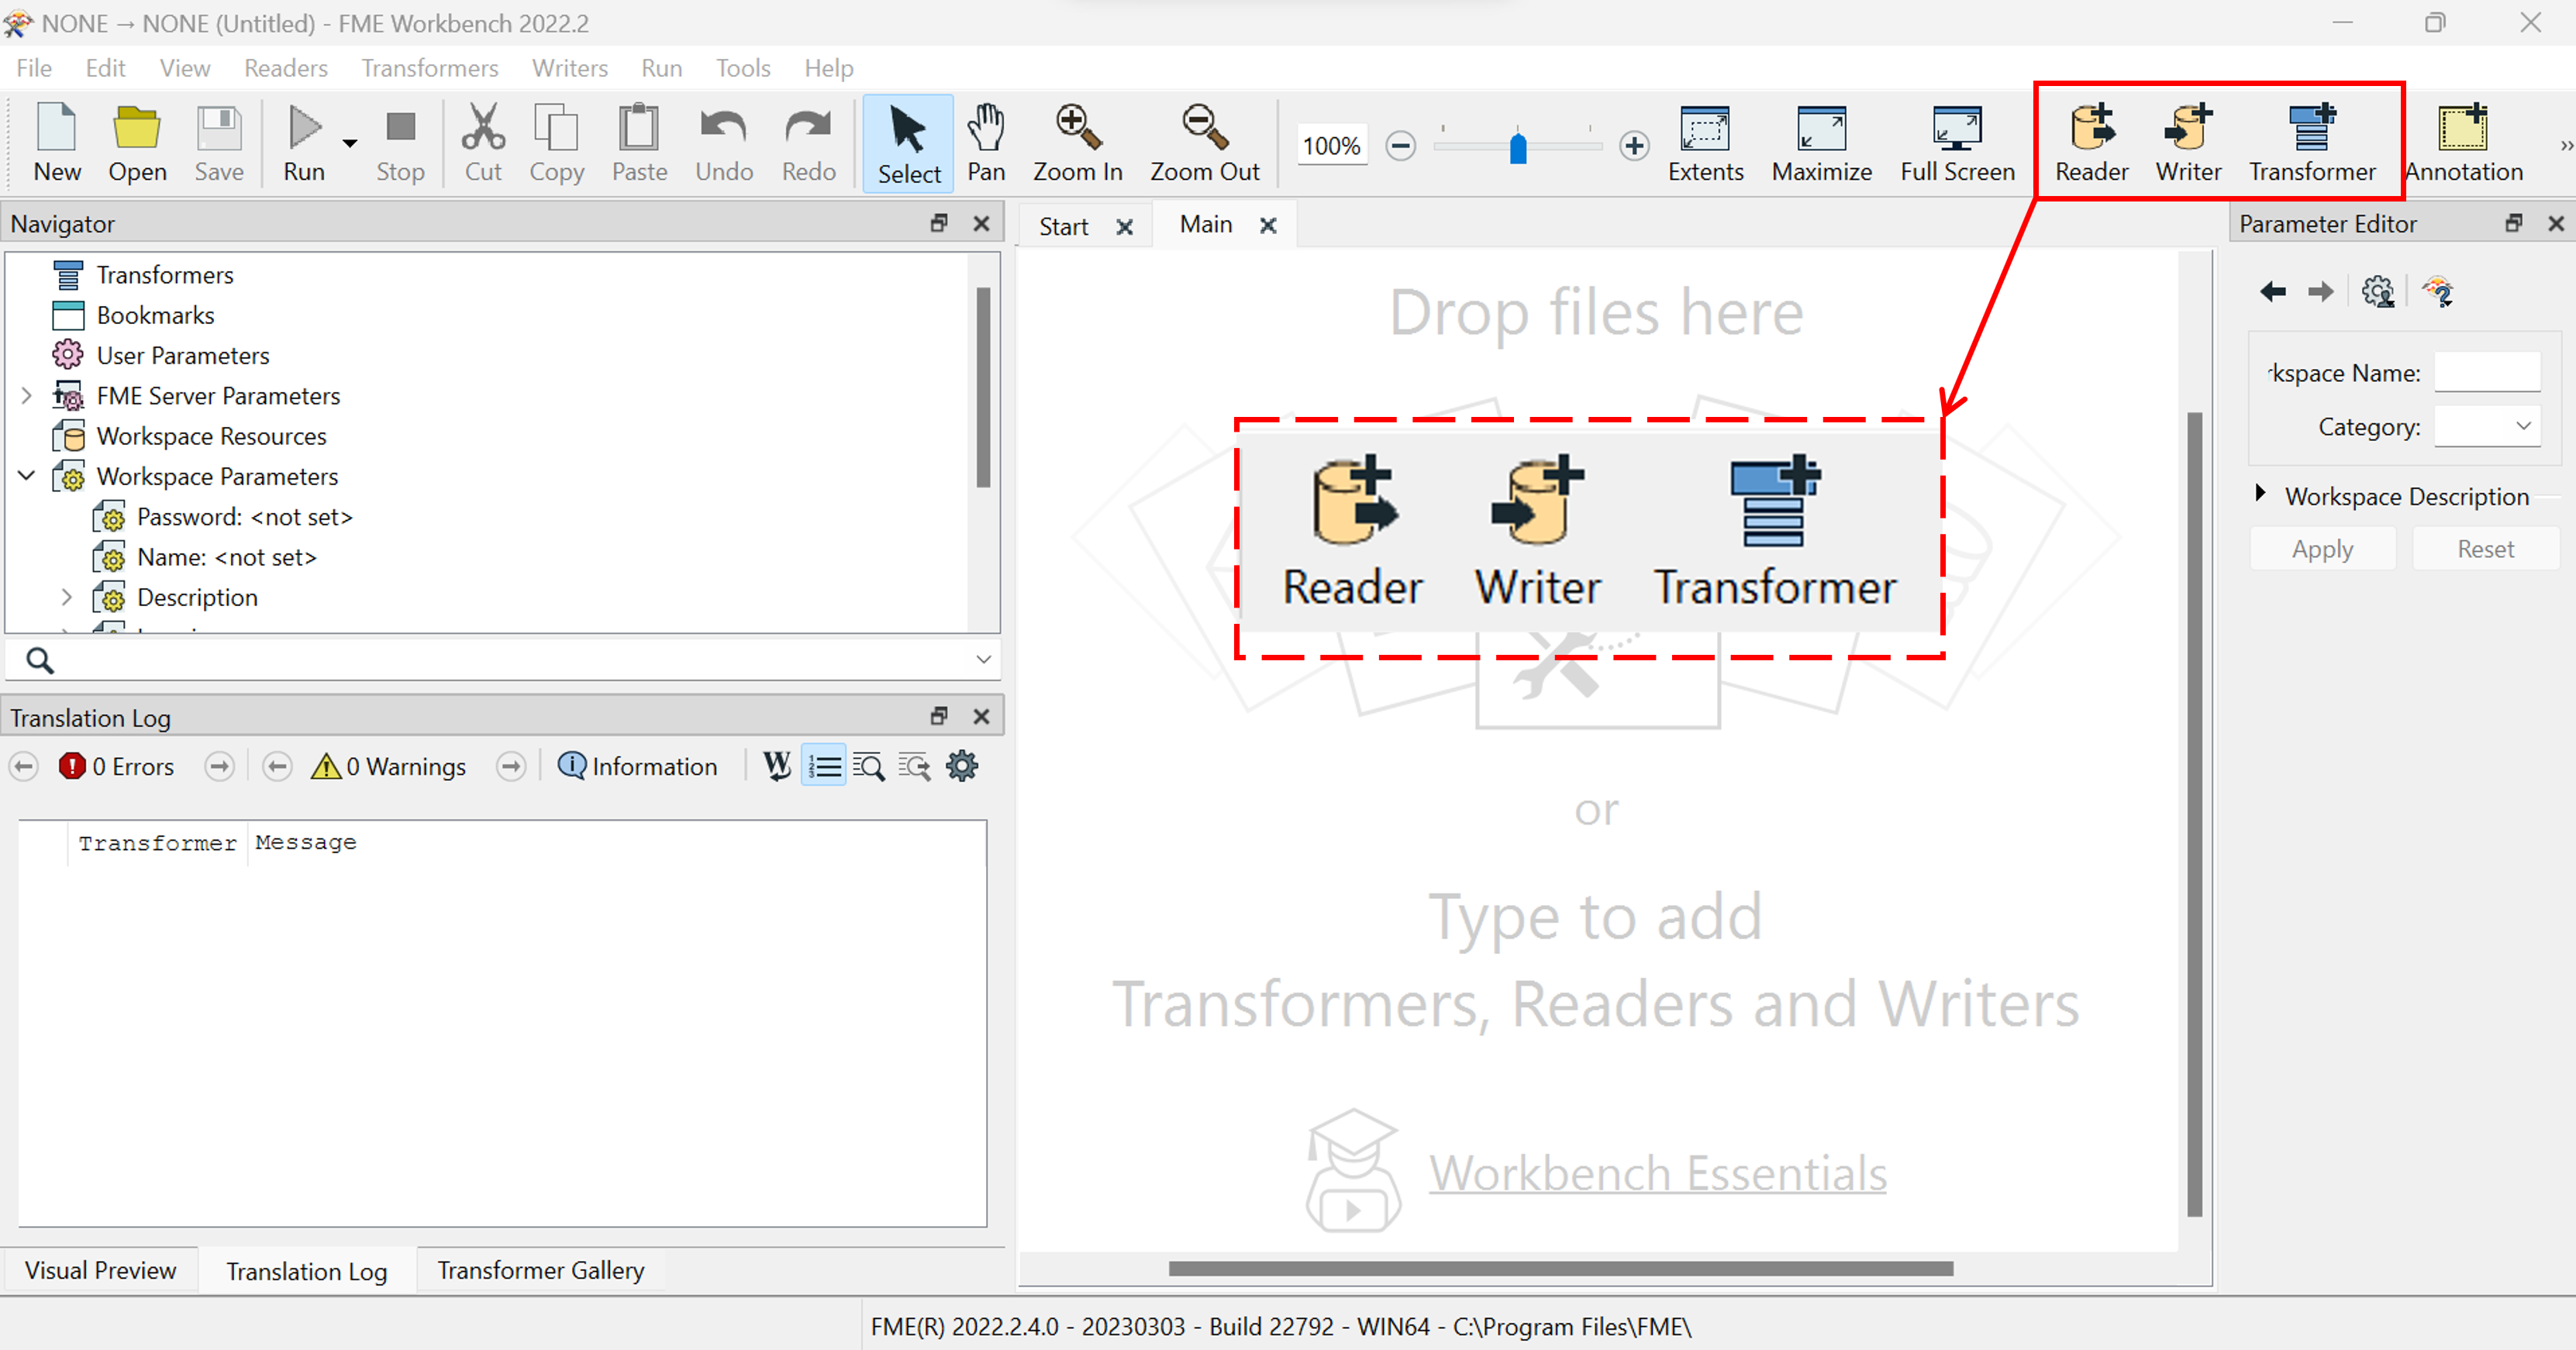
Important processing tools to understand
Readers
These refer to the input files selected for processing. You can open a reader an choose any file from your system. The process of choosing a reader is very similar to opening a file in the FME Data Inspector. Fill in all the required parameters and click OK.
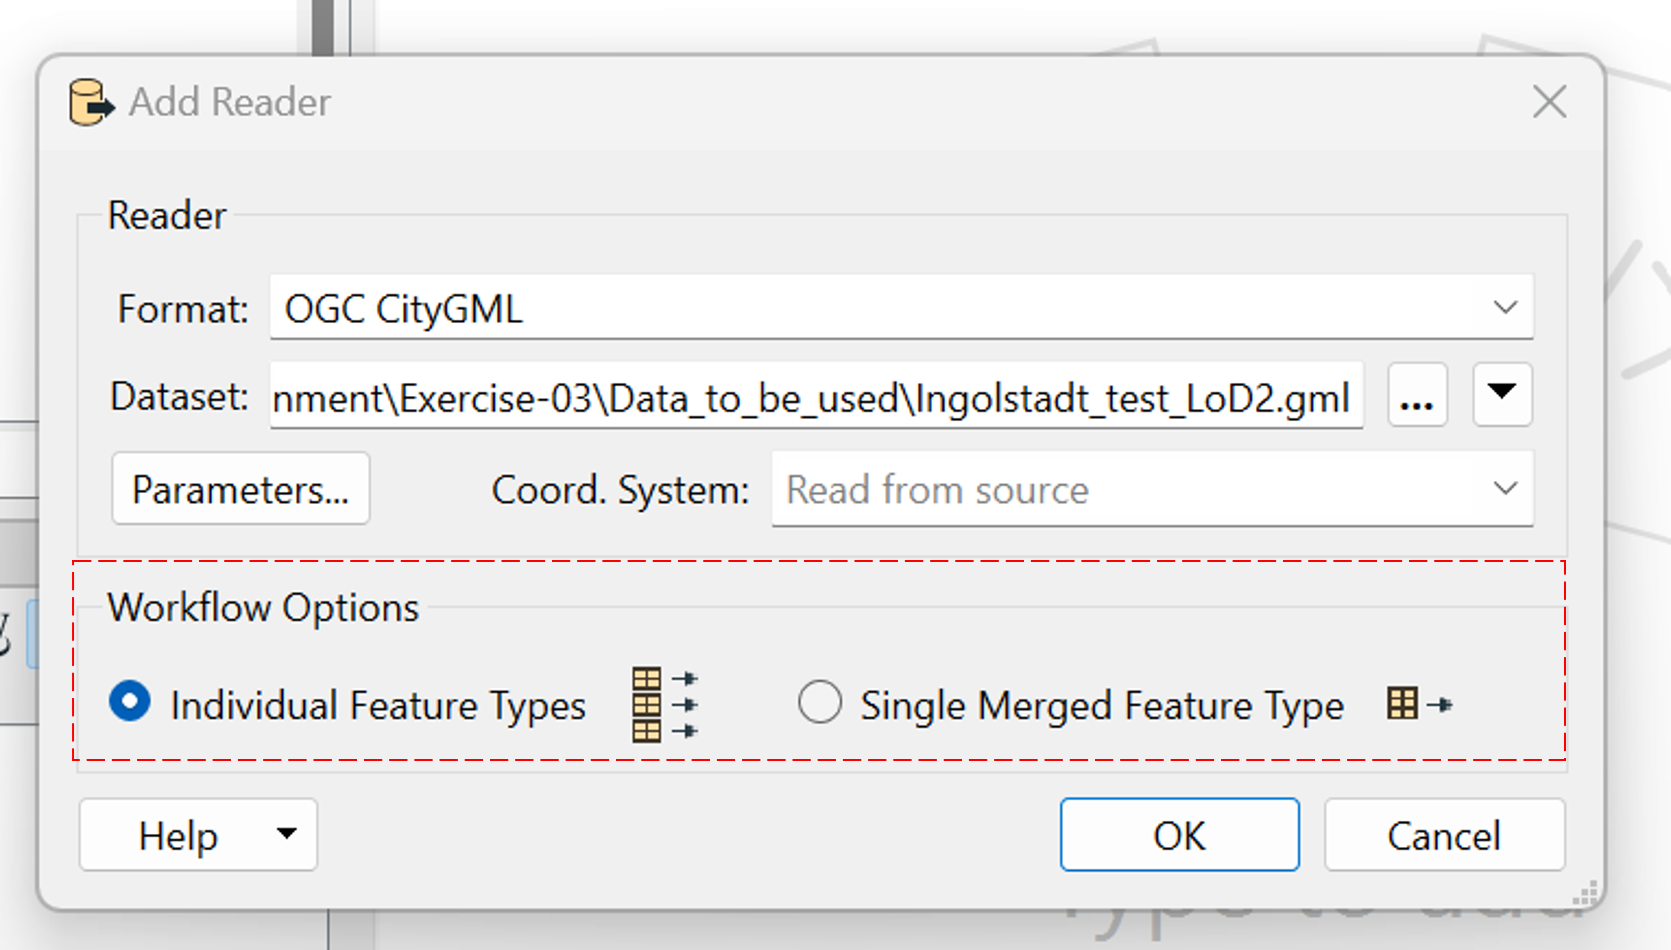
Note
There are 2 workflow options – Individual Feature Types and Single Merged Feature type. If you choose Individual Feature Type (which is the default option), you get all the layers in the file as an individual reader. If you choose the Single Merged Feature Type, all the layers in the file are merged into a single reader. You can open any file in both the workflow options to see how it looks in the workbench.

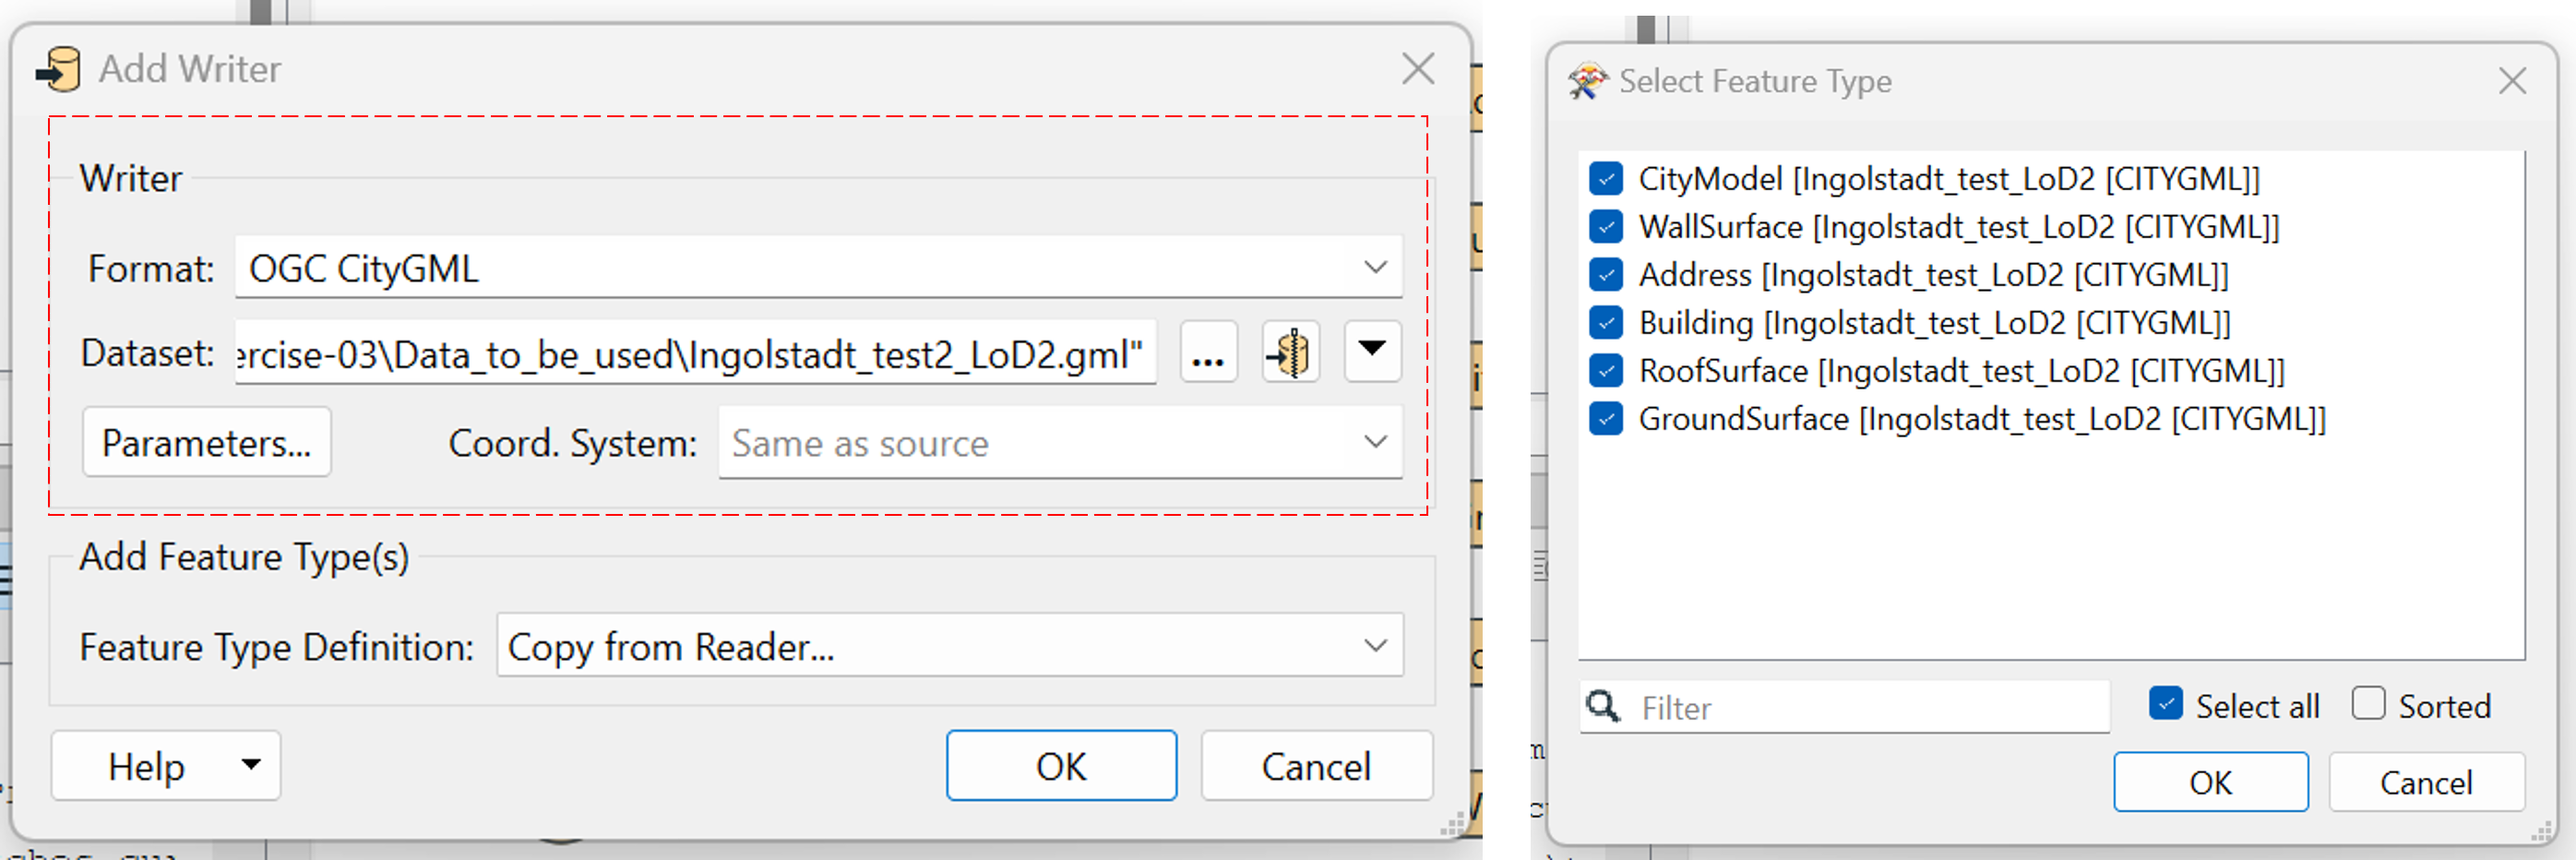
Writers
Writers are the output files to which the final data is saved. When you click on the Writer button, you will be asked to define the following required parameters:
Format: The data format of the output file.
Name: The name of the file along with the location of the file in your system.
Feature Type Definition: Here you can choose from multiple options.
Automatic – This defines the feature of your output file automatically.
Manual – You can define the feature by choosing a custom schema that you have developed.
Copy from Reader – If your input and output will be in the same format, you can simply copy the feature definition from the reader.
Import from Dataset – This allows you to define your dataset based on a 3rd dataset of your choice from your system.
Dynamic (Advanced).
None (Advanced).
Tip
If you choose Copy from Reader, select all the feature definitions you want to copy from the reader
When defining a new writer, you need to define the location and name of the new file. Please do not overwrite the existing file. It is a good idea to create a new folder Output and save all your files there for convenience.
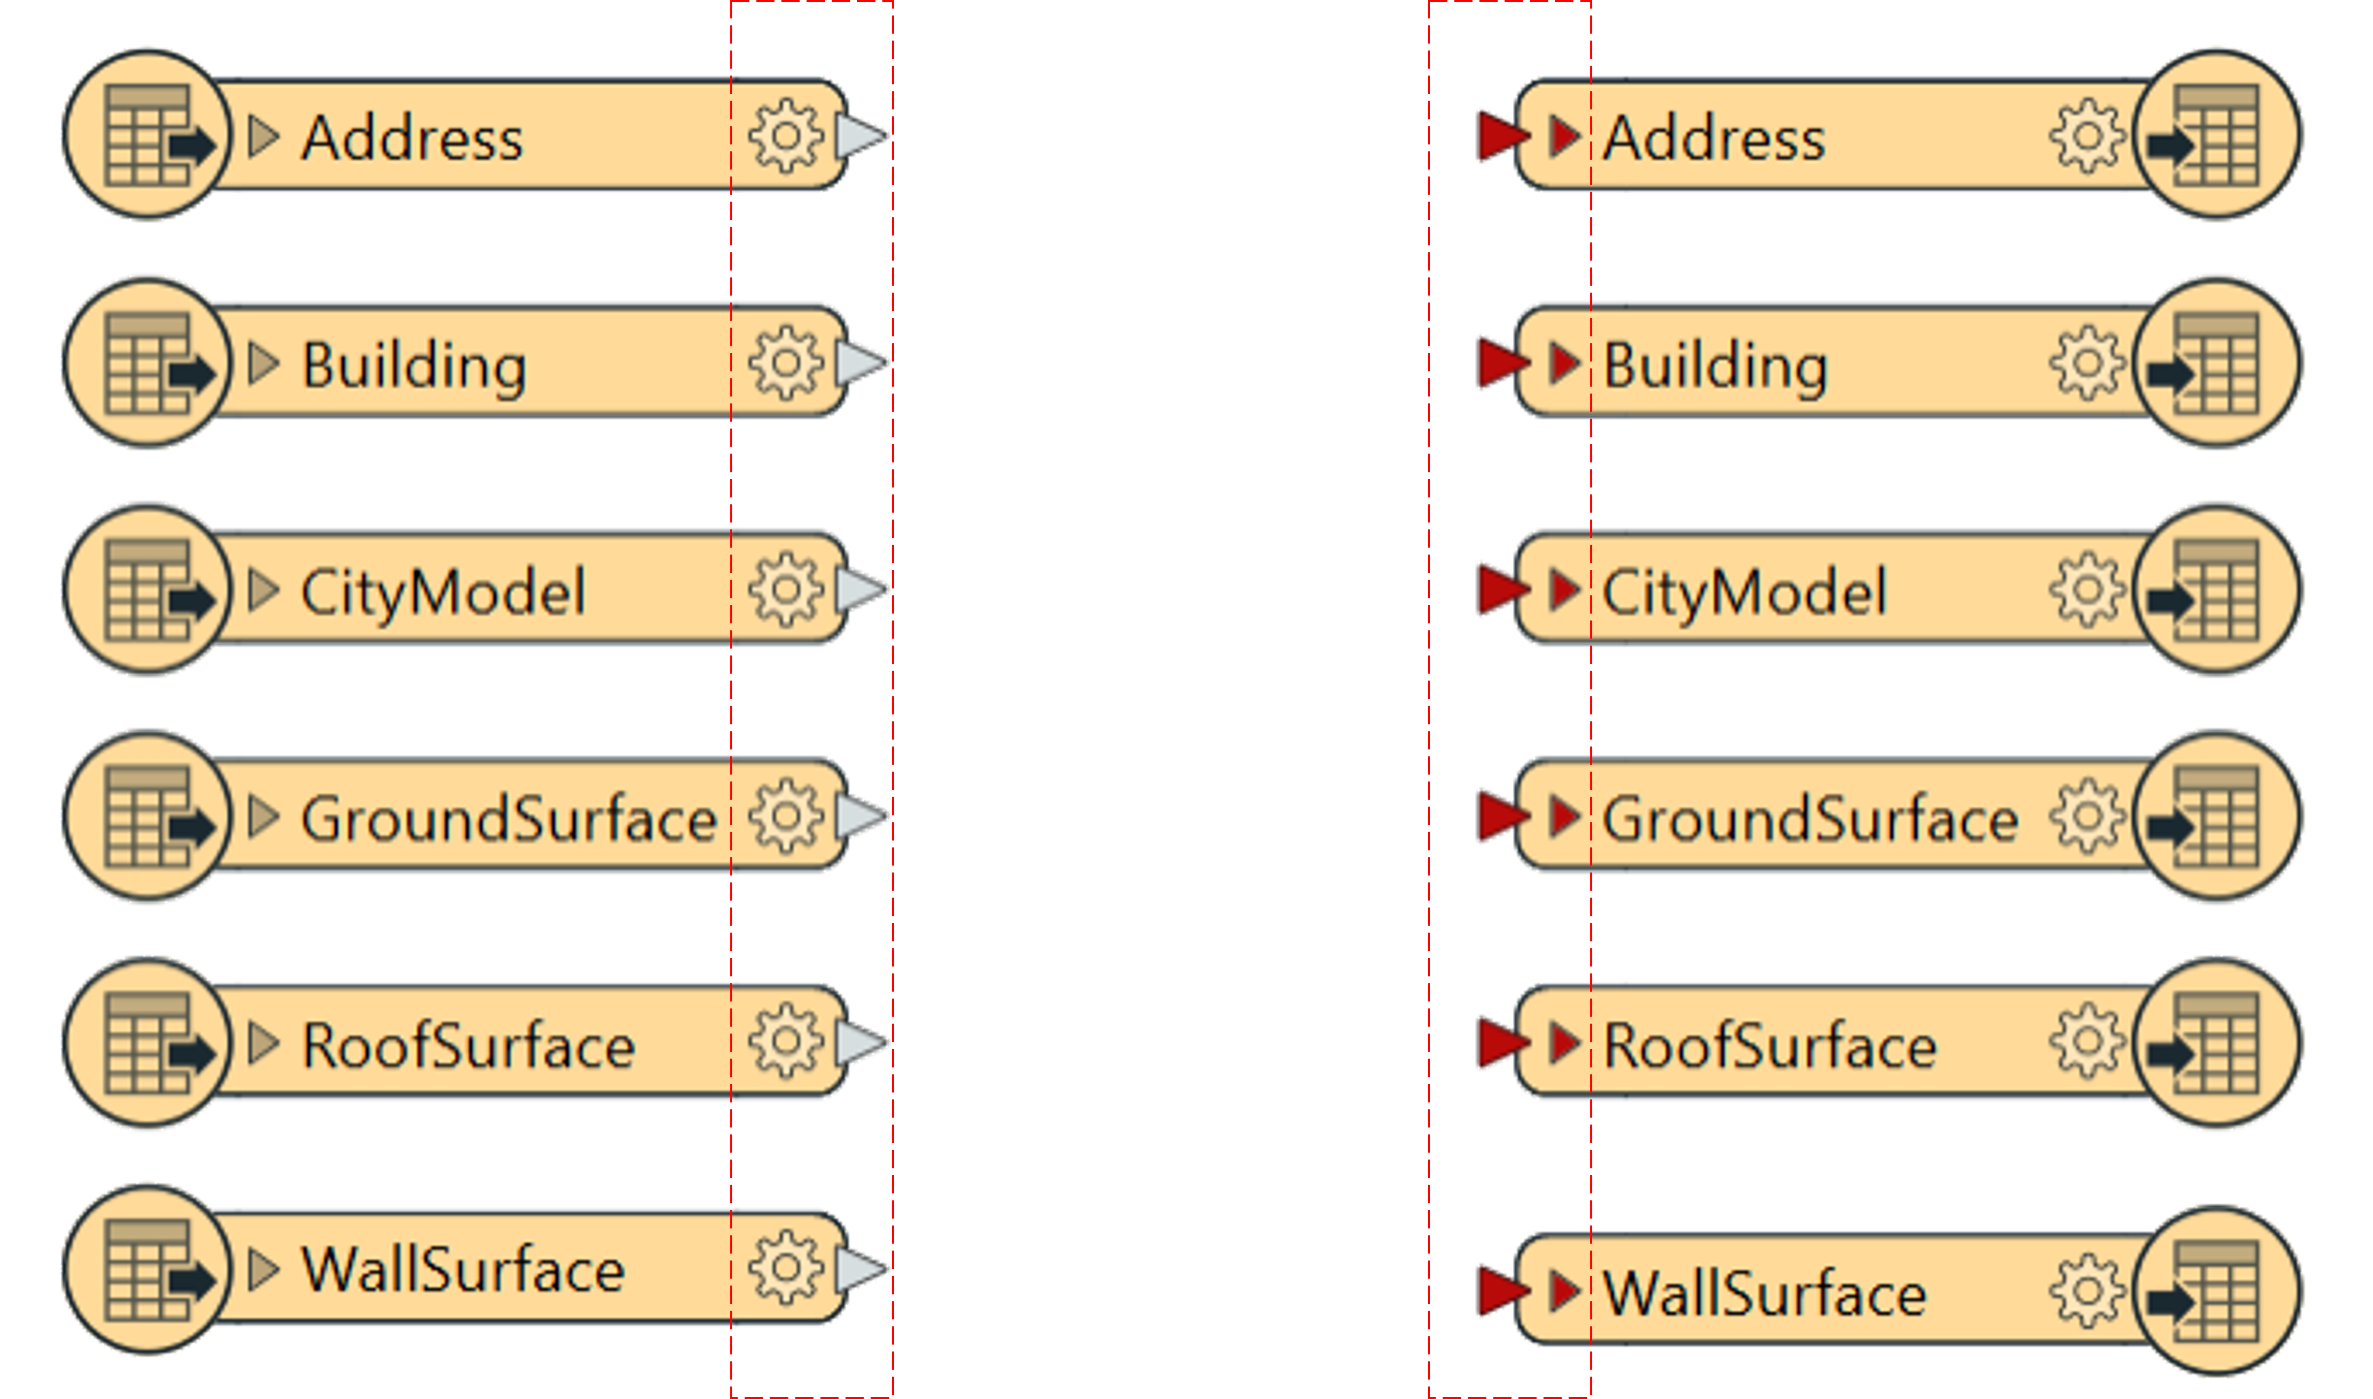
The readers are distinguished by an outgoing triangular arrow that denotes the outward flow of information from the reader. The writers are distinguished by an incoming triangular arrow that denotes the inward flow of information from the process.
Transformers
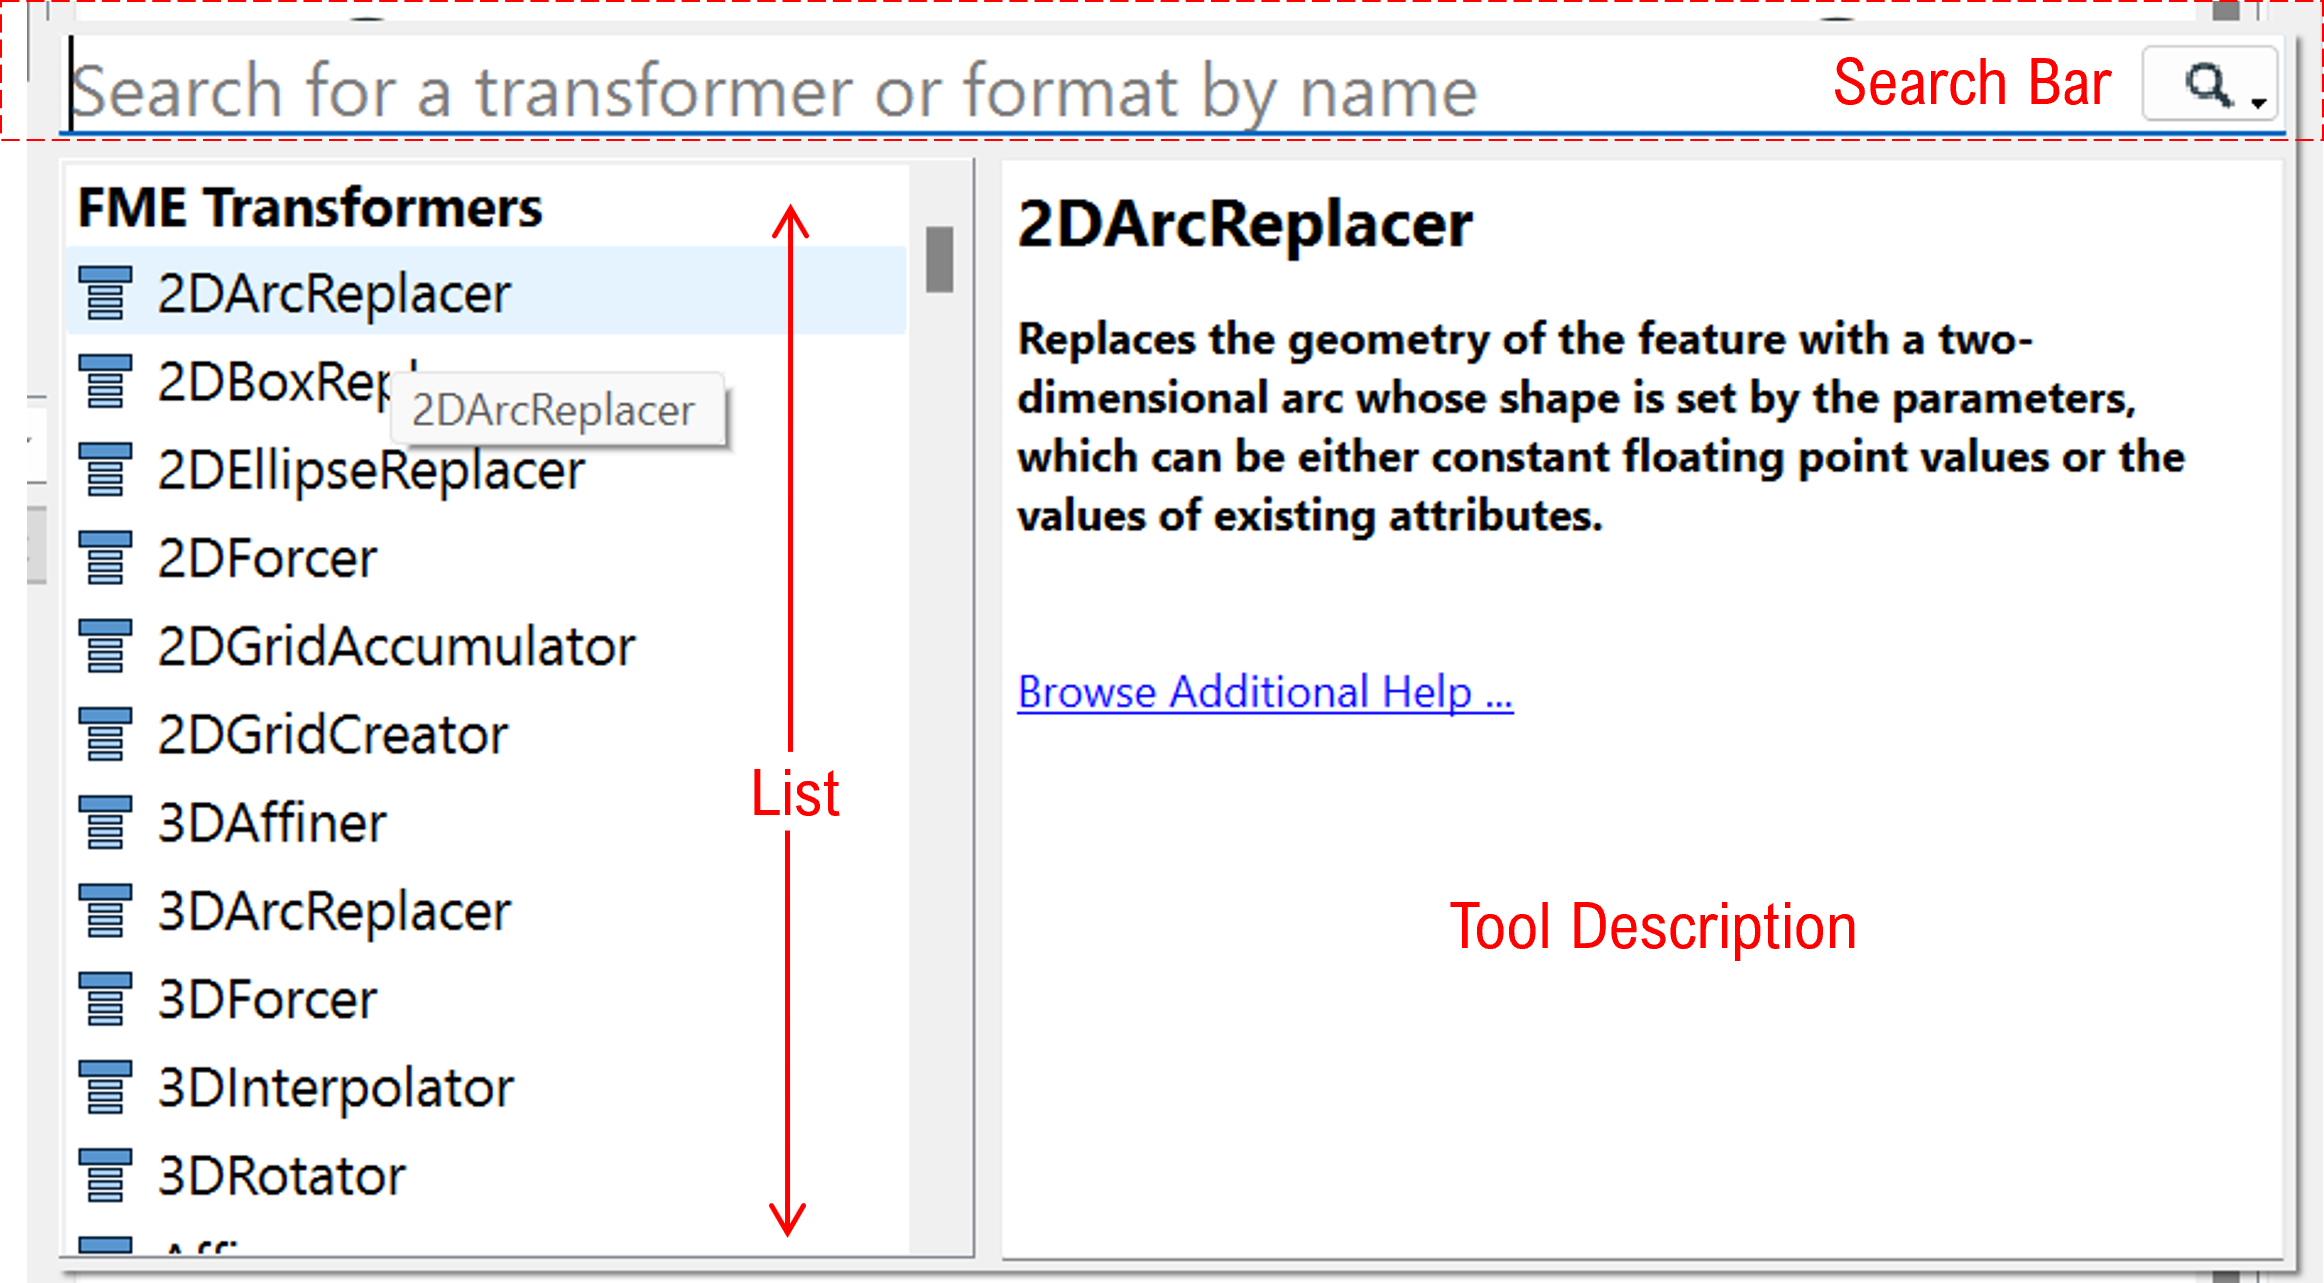
Transformers are the tools that are used to manipulate the date. There are hundreds of transformers in FME, and each transformer has a short explanation denoting its function. For further information, each transformer has a detailed description in Safe Software’s online documentation. To select a transformer, click on the Transformer button and choose one from the given list.
A Sample Workflow
This is how a sample workflow looks once the readers, writers and the transformers are added.
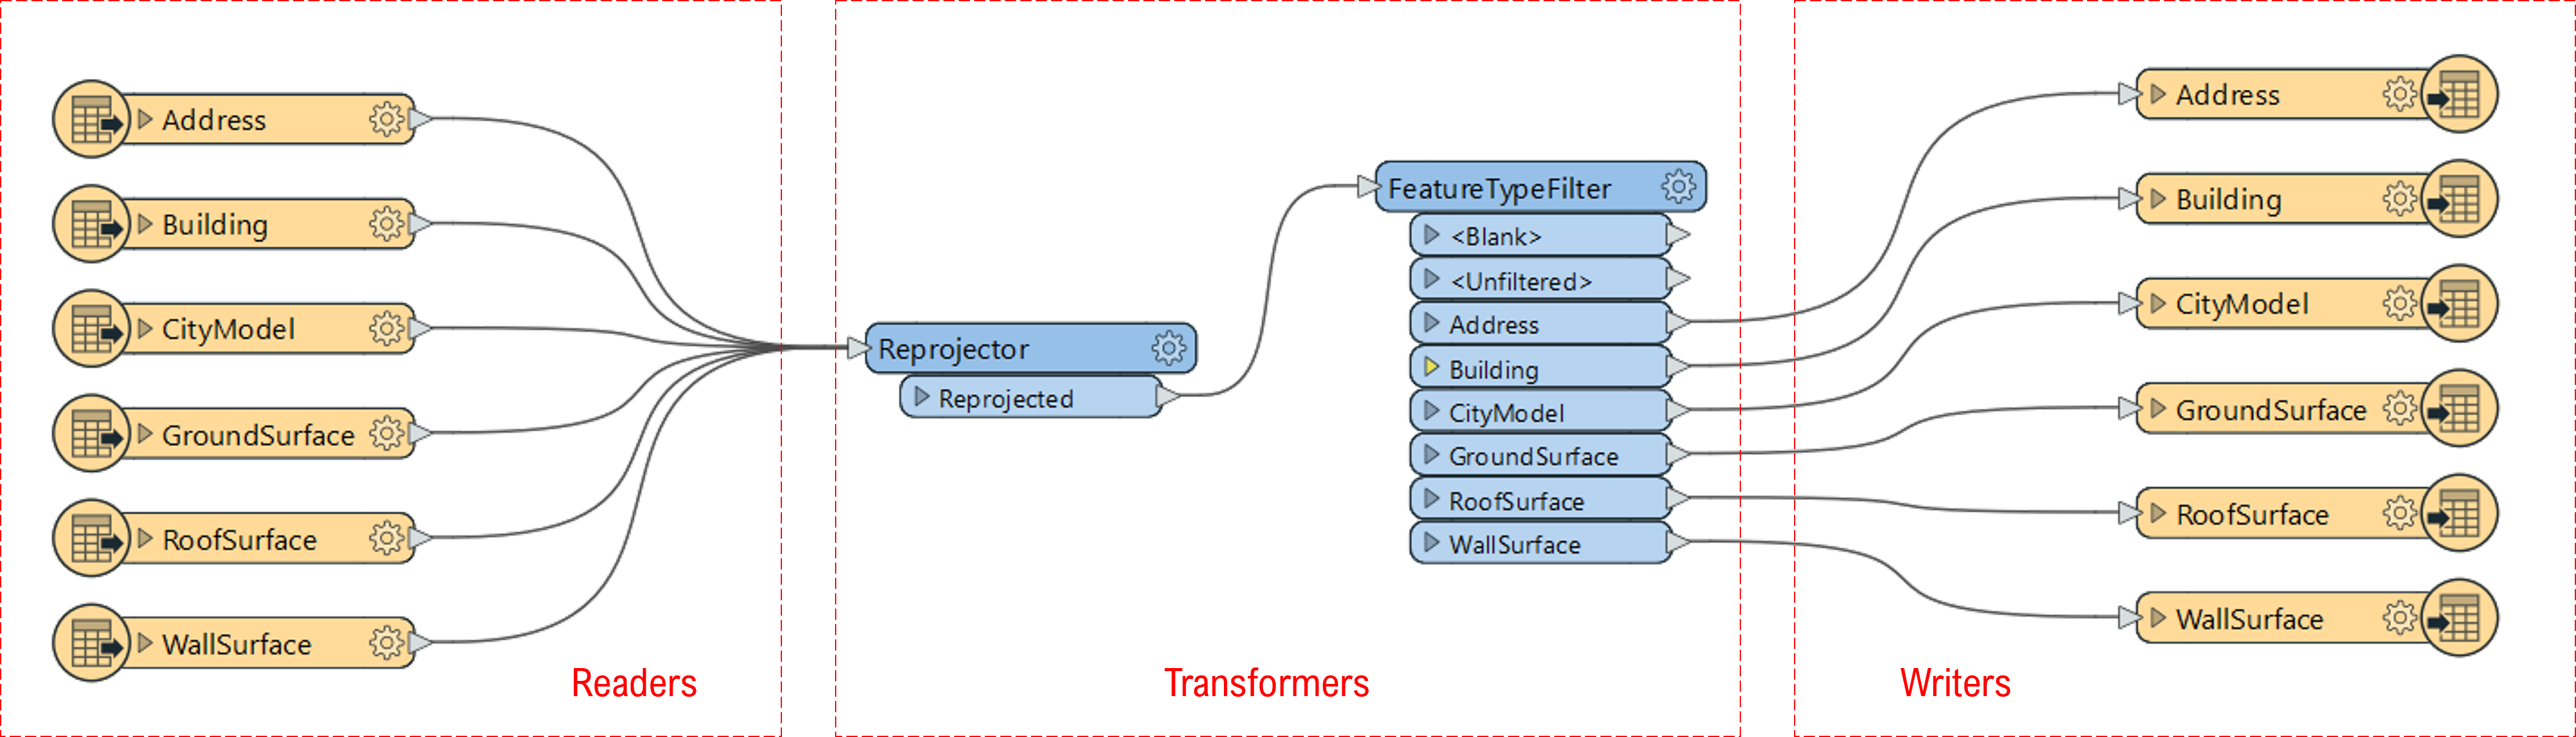
As mentioned in the introduction, the workflow in the workbench is a in the form of visual programming where Readers are connected to Transformers and the transformers are connected to the Writers.
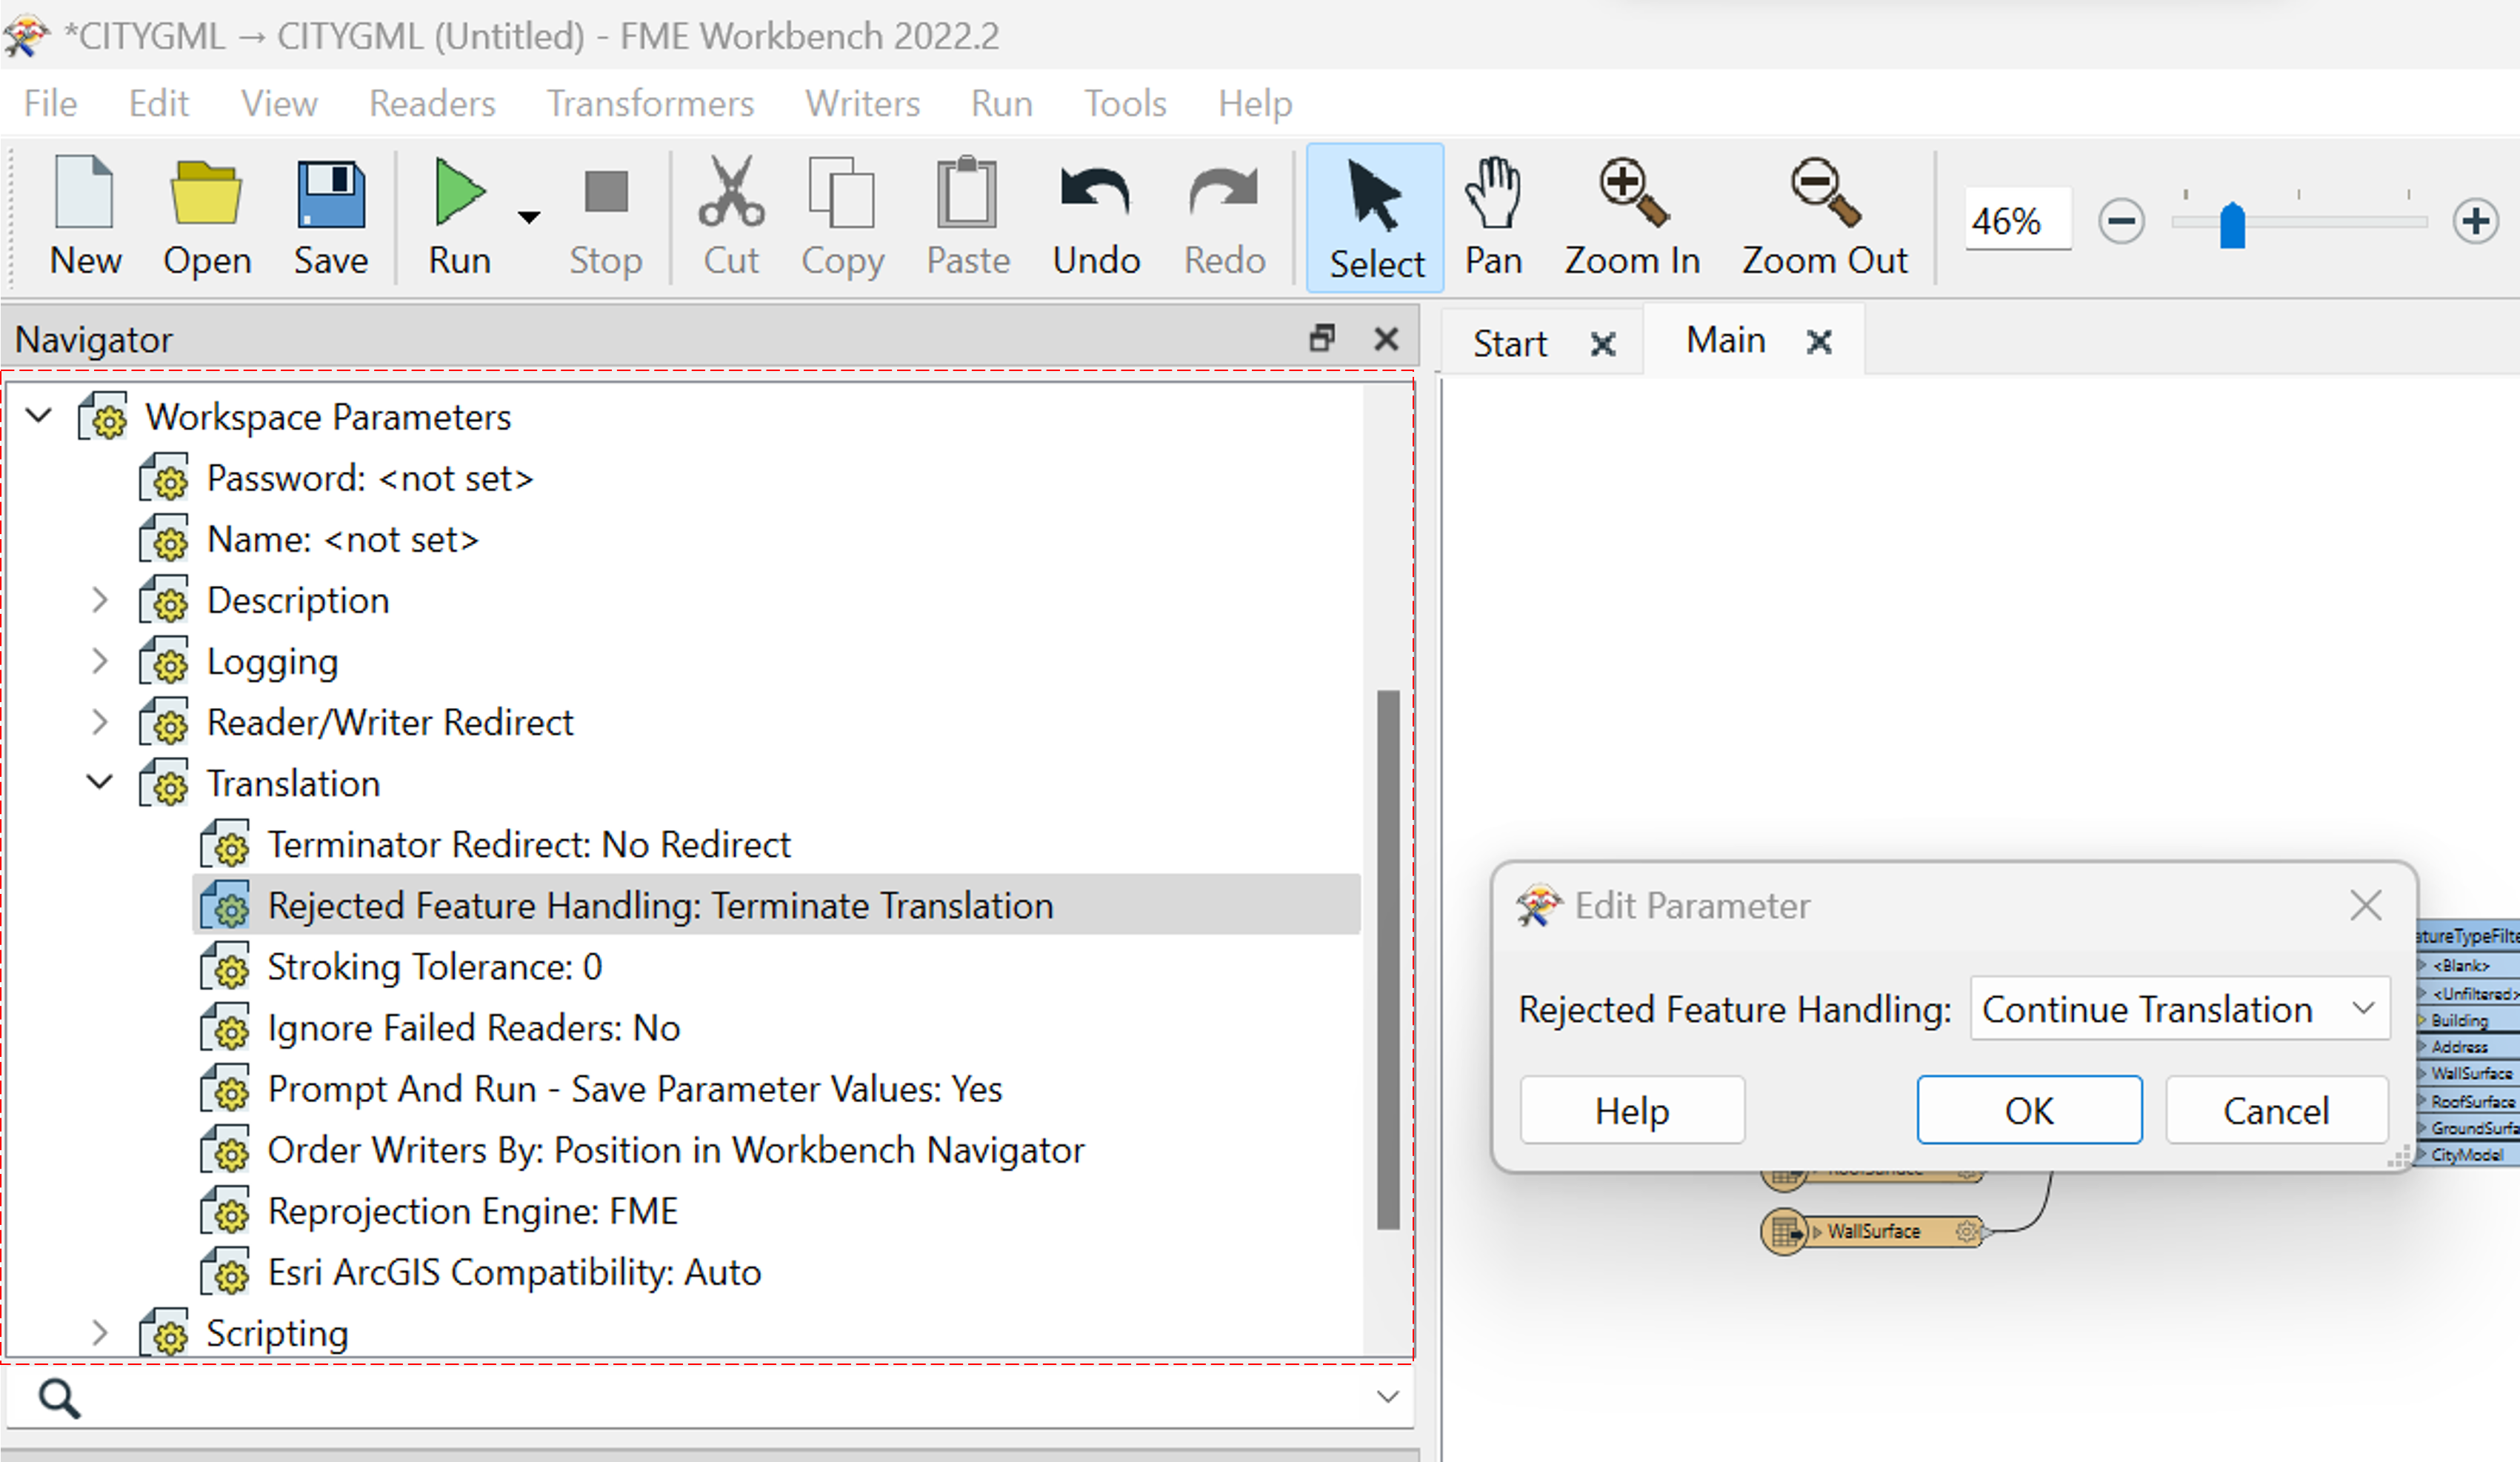
Workspace parameters
The workspace parameters are important to optimize the running of your workbench. Before running your workbench, make sure to edit the Parameter – Rejected feature Handling to Continue Translation. This will make sure that the workbench finishes its process even if a few features in your reader are unsupported or inconsistent.
Running the Workspace
You have multiple option to run the entire/partial workspace as per user choice.
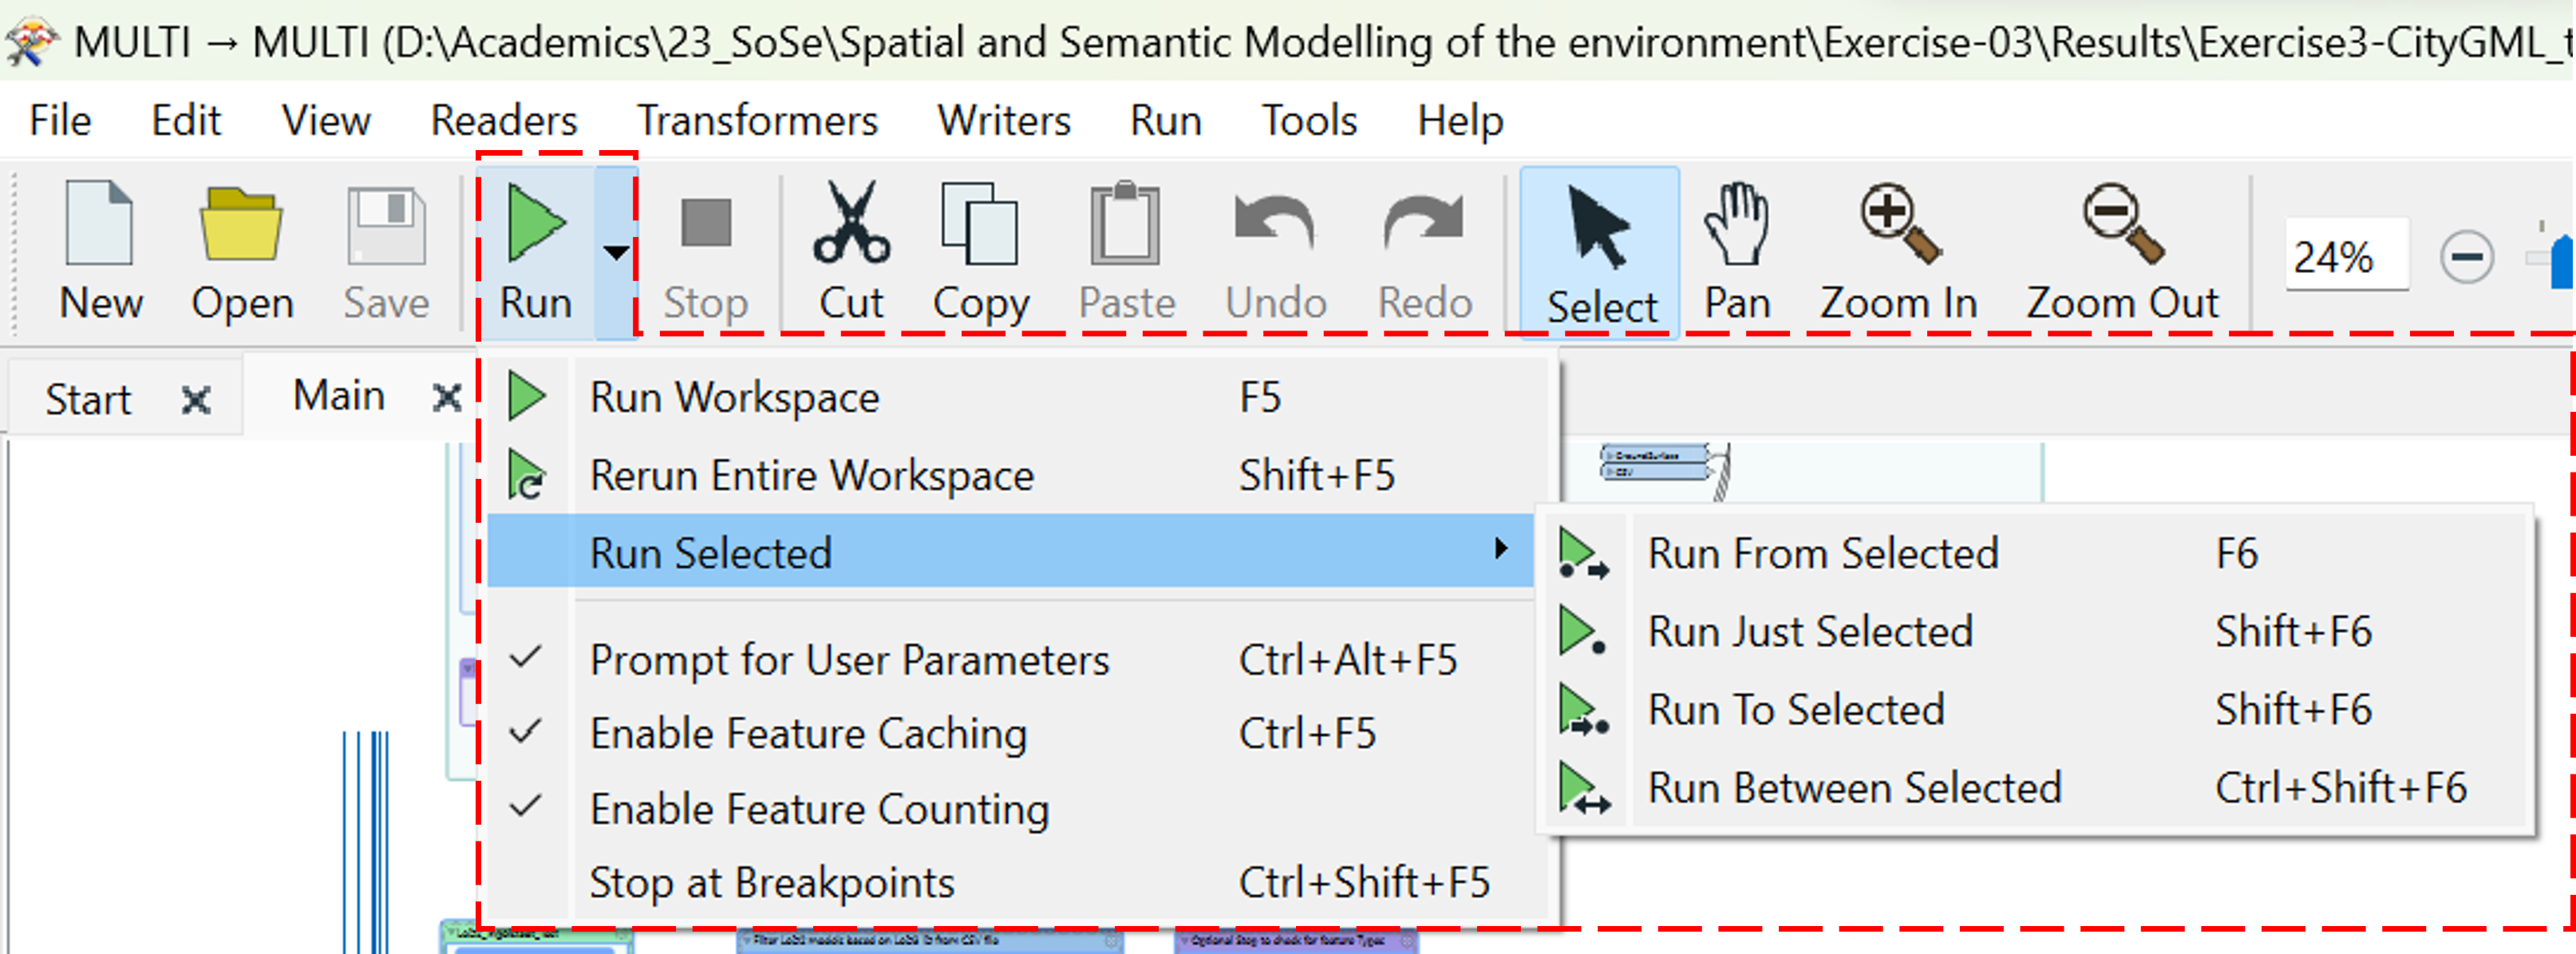
Run From Selected – Will run outward from the reader/writer/transformer selected.
Run Just Selected – Will run only the selected items in the workspace (good for intermediate checks)
Run to Selected – Will run from the beginning to the selected transformer/writer.
Run between Selected – Will run between any two selected items in the selected workbench.